
Structured Crochet Witch Hat: Felted Wool and Wire Brims

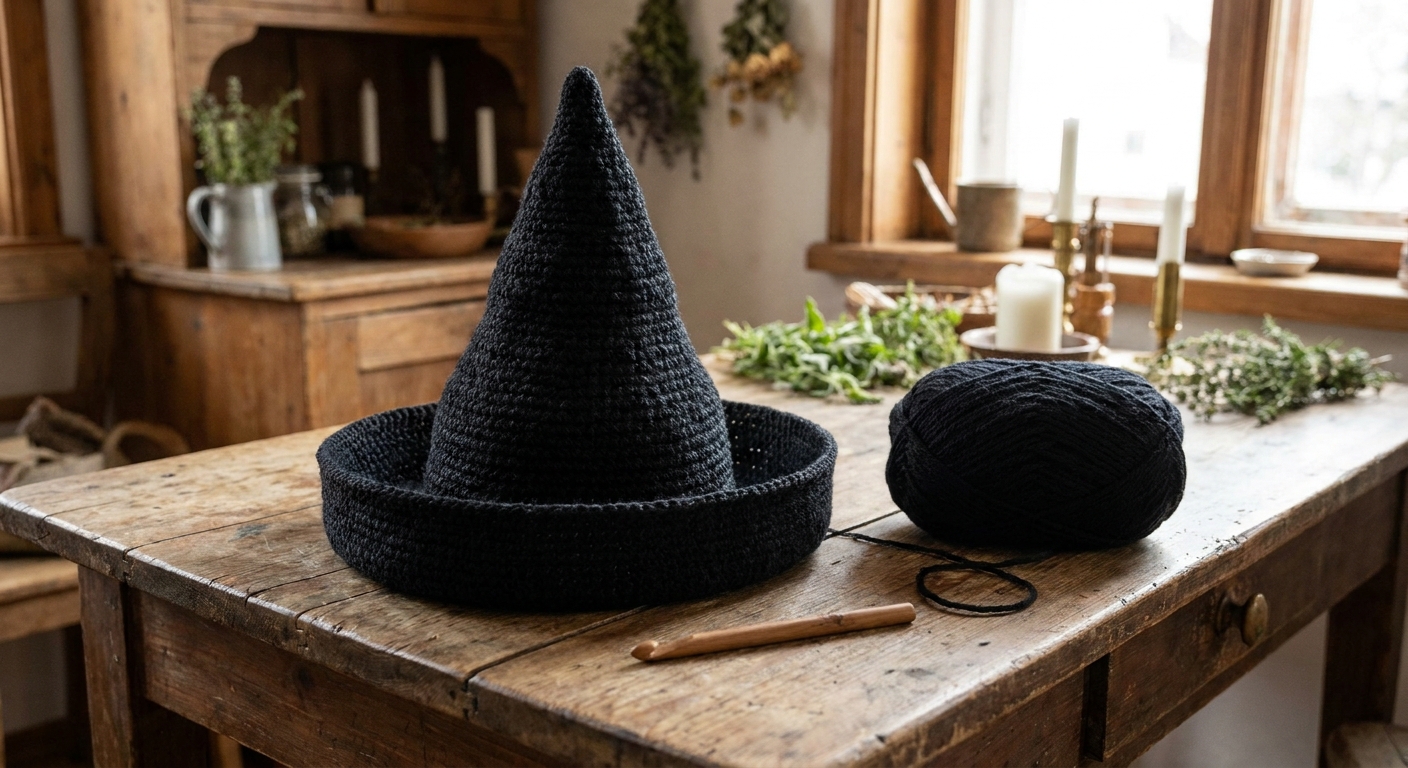
I love a floppy, swishy witch hat for photos, but when you want that classic Halloween silhouette, crisp brim, confident point, and the whole thing standing up on its own, structure matters. My favorite way to get that structure is a one-two punch: intentional felting with the right wool, plus a wire-reinforced brim that holds its shape even when you toss the hat in a costume bin.
Let’s talk about how to pick a feltable 100% wool and how to build in wire support without making the hat uncomfortable.
What makes a witch hat stand up
A structured witch hat needs support in three places:
- The fabric itself: dense stitches and a fiber that can lock together (felt) into a sturdier sheet.
- The brim: a wide circle wants to ripple or droop unless it has reinforcement.
- The crown: the point needs enough stiffness to avoid folding over, especially if it’s tall.
You can get there with spray stiffeners and craft felt inserts, but if you specifically want a crocheted hat that becomes its own structure, non-superwash wool is the star of the show.
Choosing 100% wool for felting
When I’m shopping my stash or choosing a skein for a felted witch hat, I’m looking for wool that will happily grab onto itself during agitation and temperature change. That usually means 100% non-superwash wool.
Non-superwash vs superwash
Non-superwash wool has intact scales along the fiber. When you add heat, moisture, and friction, those scales interlock and shrink into a denser fabric.
Superwash wool has been treated so those scales do not lock the same way. It is made to resist felting and is far less reliable for intentional felting. (Yes, some superwash can still felt a little under harsh conditions, but it is not the predictable, purposeful felting you want for structure.)
If you’ve ever wondered why one wool swatch tightens into a little armor plate and another just gets limper, this is usually why.
What the label should say
- Fiber content: 100% wool is simplest and most predictable for felting.
- Avoid: “superwash,” “machine washable wool,” or anything that strongly advertises easy-care treatment.
- Blends: wool blended with acrylic can still felt, but the acrylic portion will not. That can leave you with a looser or patchier felt, especially at lower wool percentages.
Texture and twist
If you can touch the yarn in person, these traits make felting easier:
- Less slippery: a slightly grabby, rustic hand usually felts faster than a silky, slick wool.
- Not overly tightly spun: extremely tight twist can resist full bloom. You can still felt it, but it may take more agitation.
- Solid colors hide unevenness: felting can subtly change stitch definition. A solid black or deep purple is very forgiving for a witch hat.
Weight
You can felt almost any weight, but the feel and time commitment change:
- Worsted or aran: my sweet spot for a wearable, not-too-heavy hat that still gains real structure after felting.
- Bulky: felts into a thick, dramatic fabric quickly, but can get warm and heavy. Great for short brims and bold crowns.
- DK or sport: can make a beautifully smooth felt, but you’ll crochet longer and may need extra rounds for firmness.
Do a mini felt test first
I always felt a small swatch before committing to a full hat, especially if the yarn is new to me. Crochet a 4 inch square in single crochet, measure it, then felt it the way you plan to felt the hat. Measure again.
Two things you’re checking:
- How much it shrinks (so you can size the hat correctly).
- How firm it gets (so you know whether you need wire, extra stiffness, or a denser stitch pattern).
For more wool decision-making in holiday projects, you might also like my thoughts on fiber choices for keepsake items: Best Yarn for Heirloom Crochet Stockings: Wool vs Acrylic.
Crochet for felting
Felting does not magically fix a loose, holey fabric. It tightens and thickens what you already made. I aim for a fabric that is already fairly dense before felting, then let felting turn it into a structured shell.
Stitches that felt well
- Single crochet: dense, stable, and my top pick for the brim and lower crown.
- Half double crochet: a touch drapier, can still felt well, nice for a slightly softer crown.
- Thermal single crochet: extremely thick and stiff, but it is slower to work and can get heavy fast.
Hook size
If the yarn label suggests a 5.0 mm hook for crochet, I often start at one size smaller for a hat I intend to felt, sometimes two sizes smaller if I want a really crisp finish. The goal is a firm fabric where you can still insert the hook without strain.
Sizing math that actually helps
Felting shrinkage varies a lot. I have seen about 10% to 30% shrinkage depending on the wool, stitch density, and how hard I push the process. Your swatch is the truth teller.
Here’s the quick way I use my swatch to scale the hat:
- Calculate shrink %: (original measurement minus felted measurement) ÷ original measurement.
- Scale up your target: target size ÷ (1 minus shrink %).
Example: if your swatch shrinks from 4 inches to 3.4 inches, that is 15% shrinkage. If you want a final 22 inch head circumference, crochet about 22 ÷ 0.85 = 25.9 inches before felting.
I use this same idea for crown height, too. It makes felting feel a lot less like gambling.
Wire brim basics
Felting can stiffen a brim, but wire is what gives you that clean, intentional circle. It also helps the brim survive storage. The trick is keeping the wire contained so it never pokes, kinks, or rubs your forehead.
Which wire works best
Look for a wire that holds a circle without fighting you every second:
- Jewelry wire in a thicker gauge can work for small brims, but it can be too bendy for dramatic wide brims.
- Craft or floral wire can work, but avoid paper-wrapped floral wire. It can get soggy, warp, and rust-stain when wet.
- Smooth, plastic-coated wire is often more comfortable inside crochet because it is less likely to snag fibers and it has no burrs, but it can still split at cut ends. Plan to cap or tape those ends.
I avoid very thin wire for brims. It can distort and create a wavy edge that is hard to correct.
How to calculate wire length
Measure the brim where you want the wire to sit, usually near the outer edge, then add a little extra for overlap. If you want a quick estimate, use:
circumference = diameter × 3.14
Add about 2 to 3 inches for joining the wire ends.
How to join wire ends safely
- Overlap the ends by 1 to 1.5 inches.
- Wrap the overlap tightly with a thinner wire, then tape over it with smooth, durable tape.
- Cover cut ends: even plastic-coated wire can have a sharp cut point. Tape the ends until they feel completely smooth.
- Check with your fingers before it goes anywhere near your stitches or your forehead.
Two ways to add wire
Option A: Crochet over the wire
- On your final brim round, lay the wire along the top of the stitches.
- Insert your hook as usual, and keep the wire trapped inside the new stitches as you go.
- Maintain steady tension so the wire sits smoothly without puckering the edge.
Option B: Make a brim channel
- Crochet the brim to your desired width.
- Add a round that folds the edge inward (often a round worked in back loops only helps create a hinge).
- Fold the edge to form a tube and stitch it down, leaving an opening to slide the wire in.
- Insert wire, then close the opening with whip stitches.
If you have sensitive skin or you are making this for a kid, I strongly prefer the channel method. It adds a soft buffer between wire and wearer.
Felting the finished hat
Felting is part science, part gentle persistence. The goals are even shrinkage, a smoother surface, and a stiffer hand without accidentally turning your brim into a potato chip.
Before you felt
- Weave in ends thoroughly. Felting locks ends in place, but you want them secure before the process starts.
- Remove anything that should not be felted, like removable ribbons, plastic decorations, or anything that might warp.
- Protect surfaces: dark wools can bleed. I use an old towel while shaping and I avoid my good linens until I know the dye is stable.
- Decide when to add wire: if you are unsure about your wire (rust, paper-wrapped, sharp cut ends), felt the hat first and add wire after. If you use a sturdy, plastic-coated wire and a fully taped join, you can felt with the wire inside, but check often so it does not kink or distort.
A careful wet-felting approach
I like to start gently and increase intensity as needed:
- Soak the hat in warm water with a tiny amount of soap.
- Agitate by hand: press, squeeze, and rub areas that need firmness, especially the brim and lower crown.
- Rinse, squeeze out water (do not wring aggressively), then assess shrink and firmness.
- Repeat in short rounds until you reach the size and structure you want.
Soap note from the trenches: some wool washes are designed to be extra gentle and can slow felting. If things are not progressing, switch to a small amount of plain mild soap and increase agitation in short bursts.
As it felts, you’ll feel the fabric shift from flexible stitches to a more unified, dense sheet. That is the magic moment.
Shaping while it dries
Drying is where your witch hat becomes itself. Shape it like you mean it:
- Stuff the crown with towels to support the point from the inside.
- Flatten the brim on a towel and smooth it into a clean circle.
- Rotate and check every so often as it dries so it does not set with a twist.
Keeping the point upright
If your witch hat has a tall point, you have a few options to keep it proudly upright:
- Felt more firmly at the top: focus extra rubbing and agitation near the upper crown during felting.
- Use denser stitches near the top: switching to single crochet near the tip helps even if the lower crown uses half double crochet.
- Add a hidden support: a small coil of wire inside the point can help, but make sure the end is fully padded and secured so it cannot poke through.
I like the simplest solution best: denser stitches plus firm shaping while drying. Most of the time, that is enough.
Common problems and quick fixes
The brim ripples even with wire
- Your wire may be too thin or too soft. A stiffer wire holds a circle better.
- Too many increases in the brim can create waves. Flatten the brim as you crochet and adjust increase spacing if needed.
- Inconsistent tension while crocheting over wire can cause puckers. Slow down on that final round.
The hat shrank too small
- It happens. Try stretching gently while damp, then dry it on a form closer to your head size.
- Next time, stop felting sooner and let drying and shaping do more of the work.
The surface looks fuzzy or pilled
- Some wools bloom dramatically. Use a sweater comb or fabric shaver gently after it’s fully dry.
- Lean into it: a slightly fuzzy surface can look wonderfully witchy and worn-in.
Safety and comfort notes
- Always cover and secure wire joins. Feel around the brim edge with your fingers before wearing.
- Consider a soft inner band: a crocheted sweatband strip or a sewn-in ribbon can make a felted hat more comfortable on the forehead.
- Be mindful of wool sensitivity: felted wool can still be itchy for some people. Wearing a thin cap underneath can help.
More Halloween crochet ideas
If you’re in a spooky-season mood, you might enjoy exploring other Halloween-friendly yarn choices, especially novelty fibers: Crocheting With Glow-in-the-Dark Yarn for Halloween Amigurumi. And if you want to browse more seasonal projects, my starting point is here: Holiday Crafts Guide.