A joyful list of 15 fast stash-buster crochet ideas for leftover yarn—coasters, granny squares, scrubbies, garlands, baskets, ornaments—plus tips for mixing ...
Continuous T-Shirt Yarn from Old Tees

Published · Last updated
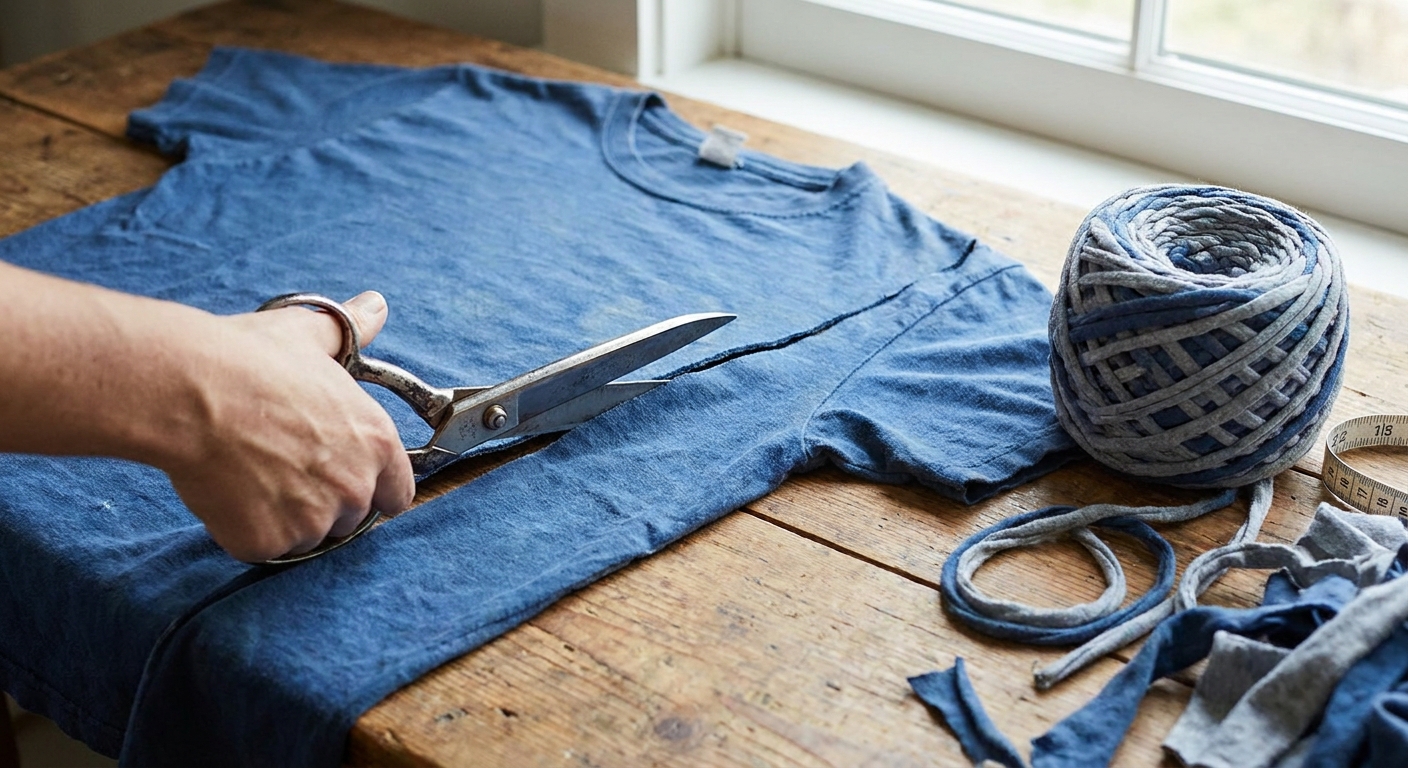
I love a shiny new skein as much as the next yarn hoarder, but I also love that moment when a worn-out cotton tee gets a second life as something sturdy and useful. T-shirt yarn is one of my favorite “stash” materials because it works up thick, fast, and tough enough for chunky crafts like baskets and rugs. The best part is you can cut it into one continuous strand, so you are not stopping constantly to tie knots.
This is my no-fuss method for cutting continuous T-shirt yarn from old clothing, with the little tricks I learned from plenty of crooked cuts, snapped strands, and one memorable afternoon where I accidentally made a very long cotton fringe instead of yarn.
What makes a good T-shirt for yarn
You can cut yarn from almost any knit tee, but a few features make the process smoother and the yarn stronger.
- Fiber: 100 percent cotton is my favorite for rugs and baskets because it is grippy and washable. Cotton blends can work too, but very stretchy blends can get skinny and “cordy.”
- Fabric type: Look for jersey knit T-shirts. Avoid anything woven (button-down shirts) because it will fray.
- Condition: Small stains are fine. Skip tees with thin, worn patches where the fabric might snap when you pull it into a strand.
- Seams and side seams: Side seams are okay. Extra-thick seams (like some athletic shirts) can create bumpy spots in the yarn.
- Prints: If a shirt has a big vinyl or screen print, I either cut around it or save that section for something else. Printed areas do not stretch and curl the same way, and they can feel stiff in a basket or rug.
If you are planning to make something that takes a beating, like a bathroom rug, choose tees that feel a bit heavier and less “slubbed.” Thin tees still work, but the yarn will be narrower and less cushy.
If you want the smoothest possible yarn, you can trim off the side seams in Step 1. You will lose a bit of length, but you will also lose most of the bumps.
Tools and setup
- Sharp fabric scissors (dull scissors chew the knit and make jagged edges)
- Rotary cutter and mat (optional, but very tidy for straight strips)
- Ruler or measuring tape
- Clips or binder clips (optional, to hold folds in place)
- A flat surface you do not mind leaning over for a few minutes
I like to wash and dry the tee first. Fabric relaxes after laundering, and you avoid storing any mystery smells in your yarn stash.
Step 1: Prep the shirt
This is the part that cuts down on tangles a lot later.
- Lay the T-shirt flat and smooth it with your hands.
- Cut off the bottom hem in a straight line. Toss the hem piece in a scrap bin for stuffing or small ties.
- Cut straight across under the armpits to remove the top (sleeves and neckline). You will be left with a fabric “tube” or a mostly-rectangular piece, depending on side seams.
- Decide what to do with side seams: If the tee is a true tube (no side seams), great. If it has seams, you can keep them for maximum length, or trim them off now for a smoother yarn with fewer bumps.
Now you are working with the easiest shape for continuous cutting: a simple band of knit fabric.
Step 2: Choose strip width
Your strip width determines your “yarn” thickness more than you might expect because jersey knit curls in on itself.
- For sturdy baskets and rugs: 1 to 1.5 inches wide is a sweet spot.
- For lighter home decor (trivets, coasters): 0.75 to 1 inch wide.
- For super chunky, fast projects: 1.5 to 2 inches wide, but only if the fabric is not too thick.
If you are new to this, start at 1 inch. You can always cut wider next time once you see how your fabric curls.
Step 3: Make the almost-cuts
This is the secret to one continuous strand.
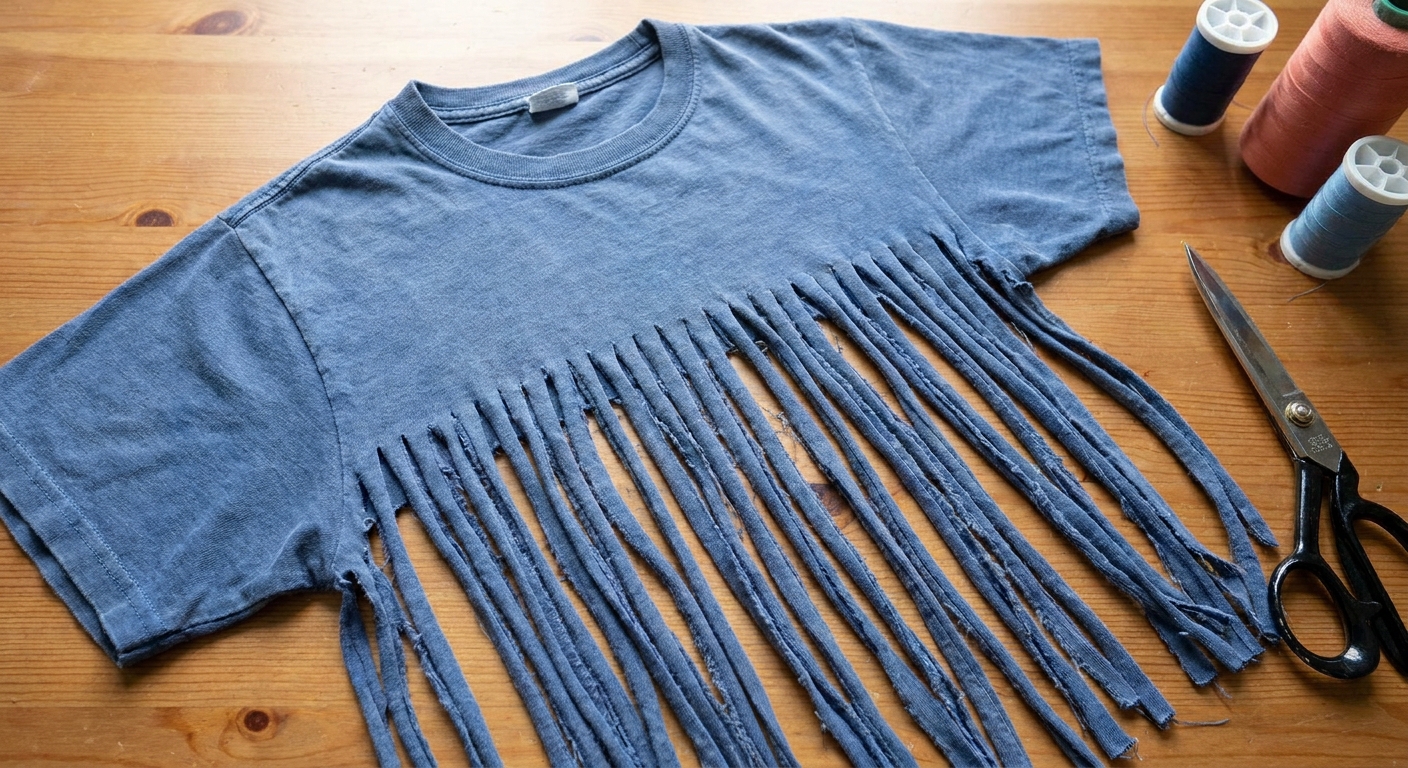
- Fold the fabric so it is easier to cut, but do not fold it in half perfectly. Offset one long edge by about 1 inch, so you have one “top” edge sticking out. That sticking-out edge is the one you do not cut through. It becomes your uncut spine.
- Cut from the opposite edge up toward the offset in strips at your chosen width.
- Stop cutting about 1 inch before the offset edge. You want to leave that connected spine uncut.
When you open it up, it should look like a skirt of strips that are still attached along one long edge. If you accidentally cut through the spine in one spot, it is not ruined. You will just have one join to make later.
Step 4: Connect into one strand
Now for the satisfying part.
- Open the fabric and lay it so the uncut spine is facing you.
- Find the first strip on one end. You are going to cut diagonally from strip to strip across the spine.
- Make the first diagonal cut at the end of the spine to connect strip 1 to strip 2. Think of it like cutting a little ramp between them.
- Continue connecting each strip to the next with one diagonal cut at a time, always moving in the same direction down the spine. Do not slice straight through the whole spine. You are only linking adjacent strips, one connection at a time.
When you are done, you can pick up the end and gently pull, and the whole thing will become one long strand.
Tip from my many mistakes: Before you commit, tug lightly on the first connection. If you connected the wrong strips, it will try to create a loop instead of a long line. If that happens, just snip that diagonal and reconnect correctly.
Step 5: Stretch and set the yarn
Jersey knit loves to curl. That curl is what makes it behave like yarn.
- Pull the strand gently along its length. Do not yank. Just steady tension.
- Let it curl naturally into a tube-like strand.
- Wind into a ball as you go to prevent tangles.
If you want a slightly flatter yarn for a specific look, stretch it less. If you want a rounder “cord,” stretch it more.
Joining without knots
One T-shirt can make a decent ball of yarn, but rugs and baskets often take more than one. I avoid big knots because they create hard lumps in crochet.
Simple slit join (my go-to)
- Cut a 0.5 inch slit near the end of strand A.
- Cut a 0.5 inch slit near the end of strand B.
- Feed the end of strand B through the slit in strand A.
- Then feed the rest of strand B through its own slit and pull snug.
This creates a flat, secure join that is much less lumpy than a knot. Leave the tails as-is, or trim carefully if there is a long whisker.
Hook size starting point
T-shirt yarn varies a lot, so I treat hook size like a starting guess, then adjust.
- For 1 to 1.5 inch strips: I usually start with a large hook in the range of about 10 mm to 15 mm.
- If your hands feel like you are wrestling the stitches: go up a hook size.
- If your fabric feels floppy and you want structure: go down a hook size or use a tighter stitch.
For baskets and rugs, I like a firm fabric. If I can easily slide my fingers between stitches, I know I should tighten it up.
How much yarn from one shirt?
It varies a lot based on shirt size and strip width, but here is a practical expectation:
- Adult small to medium tee: often enough for a small basket base and sides, or a thick trivet set.
- Adult large to XL tee: a noticeably bigger ball, sometimes enough for a sturdy medium basket.
- Rug sized projects: plan on multiple shirts, especially if you want a larger floor mat.
If you want consistent thickness, try to use tees with similar fabric weight and cut them to the same strip width.
Best projects for T-shirt yarn
T-shirt yarn shines when you want structure, friction, and durability.
- Sturdy baskets for toys, yarn, or pantry items
- Small rugs and bath mats (especially with tight stitches)
- Market totes with firm handles
- Chair pads or stool toppers
- Pet mats that can be tossed in the wash
If you are planning a market-style project, you might also like my sturdy market tote bag crochet pattern. For more general inspiration around stash materials and quick makes, browse the Yarn Crafts guide.
Troubleshooting
My yarn keeps snapping
- The shirt may be too worn or thin. Try a heavier tee.
- Cut slightly wider strips so each strand has more strength.
- Do not overstretch. Gentle tension is enough to encourage curling.
The strand thickness is uneven
- Use a ruler and mark a few guide points before cutting.
- Cut slowly with sharp scissors.
- Accept a little variation. For baskets and rugs, it usually adds a handmade texture that looks charming.
The seams make hard bumps
- Place seam bumps on the inside of baskets when possible.
- Consider trimming away the thickest seam sections and doing a slit join.
- If bumps really bother you, trim off the side seams before you start cutting strips. You will get a smoother yarn and a slightly smaller ball.
The yarn is twisting into a tangled mess
- Wind it into a ball as you stretch.
- Keep your cutting area clear so the strand can fall freely without catching.
Care tips
Most cotton tee yarn projects are washable, but bulky items hold a lot of water, and some shirts have prints or a bit of elastane that do not love high heat.
- Machine wash: Use cold or warm water and a gentle cycle. If you are unsure how the fabric will behave, test-wash a small swatch first.
- Drying: Air dry flat when you can, or dry on low heat. I avoid high heat to help prevent extra shrinkage and twisting.
- Reshaping: Tug your basket or rug back into shape while damp, then let it finish drying.
If you want a quick refresher on washing and shaping fiber projects in general, my blocking habits are covered in how to wash and block hand-knit wool garments. The fiber is different, but the gentle approach carries over nicely.
My make-it-easier habit
Before I cut, I decide what the yarn is for. Basket? Rug? Tote? It keeps me from making super skinny strips for a project that really needs strength. If you want to get into that same habit, my little planning routine is in make a project card before starting crochet. It is such a small step, but it saves a lot of second-guessing.
Most importantly, give yourself permission to treat the first shirt as practice. Even “imperfect” T-shirt yarn still crochets up into something solid and useful, and that is exactly the kind of crafting joy I never get tired of.