
Sturdy Market Tote Bag Crochet Pattern

I have crocheted more market bags than I can count, mostly because I keep leaving them in the car, gifting them, or deciding I need “just one more” in a different color. After years of hauling produce, jars, and the occasional very optimistic watermelon, I’ve learned one thing the hard way: the yarn choice matters as much as the pattern.
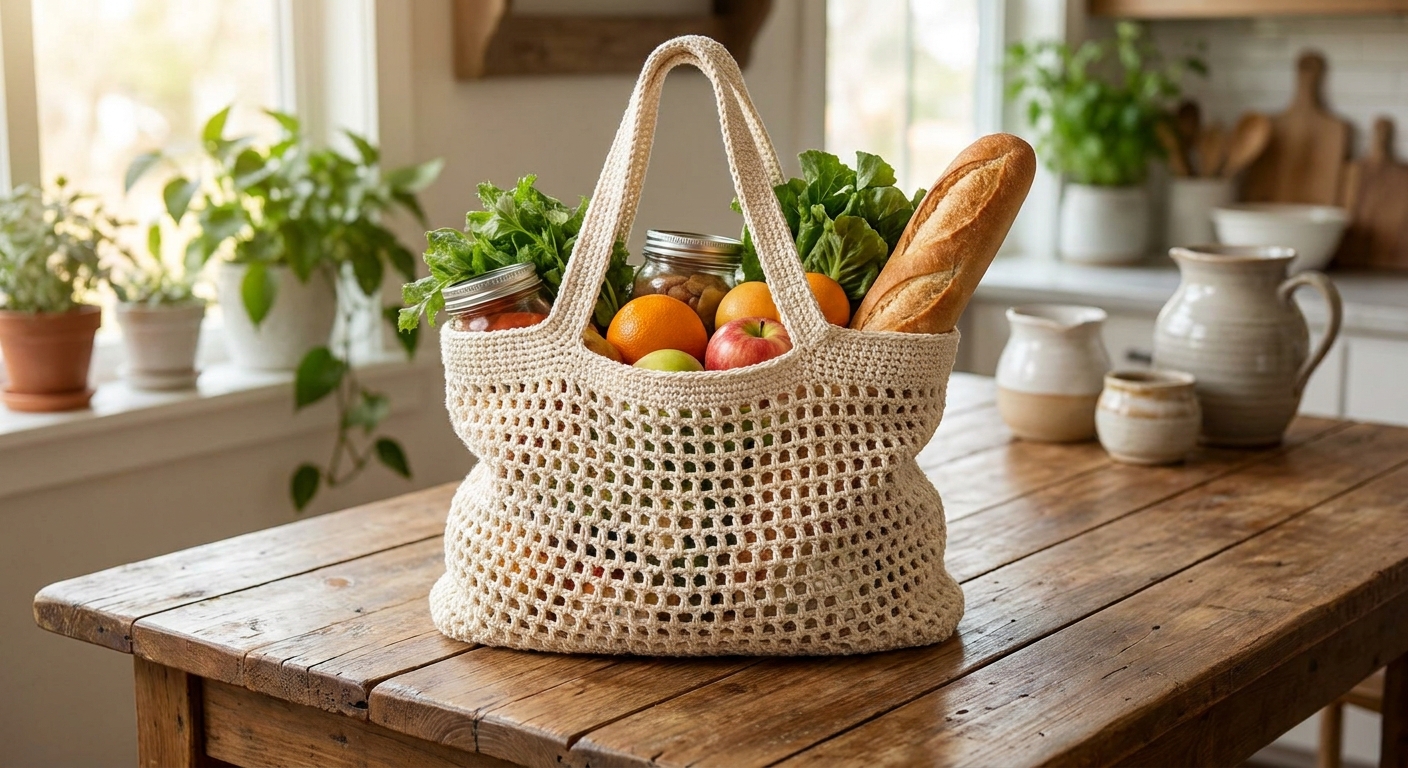
This sturdy market tote is a simple expanding mesh bag with a solid base and reinforced handles. It is designed specifically for mercerized cotton, because mercerization often gives cotton that sweet spot of strength, smoothness, and reduced stretch that helps keep a bag from turning into a saggy sling by week two.
Why mercerized cotton works best
If you have ever crocheted a bag in a soft cotton and watched it grow two inches every time you set it down, you already understand the problem. Market bags live under tension, and yarn that stretches or fuzzes will show it fast.
Less stretch, better shape control
Mercerized cotton is treated to increase luster and strength, and it typically has a tighter, smoother structure than unmercerized cotton. In real-life bag terms, that often means:
- Handles stay closer to the length you intended instead of creeping longer with every trip.
- Mesh openings stay neater instead of stretching out into big, uneven holes.
- The bag keeps its shape better when you set it down.
Strong and smooth under friction
Grocery totes rub against cart handles, pantry shelves, car floors, and your coat zipper. Mercerized cotton tends to hold up better than fuzzier, loosely spun cottons, and the smoother surface helps reduce snagging.
Washes well
A reusable grocery bag should be washable, full stop. Mercerized cotton can handle frequent washing, and it often stays looking crisp longer because it is less prone to fuzzing than softer cottons.
If you want to read more about how fiber choice changes the performance of a finished project, my deep dive on fiber tradeoffs for holiday makes is here: Best Yarn for Heirloom Crochet Stockings: Wool vs Acrylic. Different project, same “what does this fiber do under stress” thinking.
Sturdy mesh market tote pattern
Skill level: Confident beginner (comfortable working in the round and counting rounds)
Finished size (as written): About 13 in wide at the base, 14 to 15 in tall (not including handles). Mesh body expands generously when filled.
Size note: Your base diameter will vary with yarn, hook, and tension. Use the round counts below as a guide, and feel free to stop increasing when the base is the width you want.
Yarn: Worsted weight (Category 4) mercerized cotton, about 250 to 320 yds depending on handle length and bag height.
Hook: 4.5 mm to 5.0 mm (choose the smallest hook that gives you a base that feels firm)
Notions: Stitch marker, tapestry needle, scissors
Stitches and abbreviations (US terms)
- ch: chain
- sl st: slip stitch
- sc: single crochet
- hdc: half double crochet
- dc: double crochet
- inc: increase (2 stitches in same stitch)
- rep: repeat
- sp: space
Gauge
Gauge is not fussy for a mesh tote, but the base should feel firm. If your base feels floppy, go down a hook size. If it feels stiff like a coaster, go up a hook size.
Pattern notes
- Base is solid for durability and to prevent small items from poking out.
- Body is open mesh so it expands without adding bulk or weight.
- Top edge is cinched so the opening stays practical, not comically wide.
- Handles are reinforced with an extra pass of stitches to reduce stretching.
- Join rounds with a sl st unless noted. Place a marker in the first stitch of each round to help you stay oriented.
If you like keeping your projects organized, I also recommend making a quick project card before you start so you can jot down hook size, yarn colorway, and any tweaks you make: Make a Project Card Before Starting Crochet.
1) Solid base
Round 1: Ch 4, sl st to first ch to form a ring. Ch 1. Work 8 sc into ring. Sl st to first sc. (8)
Round 2: Ch 1. Inc in each st around. Sl st to first sc. (16)
Round 3: Ch 1. (Sc in next st, inc) rep around. Sl st to first sc. (24)
Round 4: Ch 1. (Sc in next 2 sts, inc) rep around. Sl st to first sc. (32)
Round 5: Ch 1. (Sc in next 3 sts, inc) rep around. Sl st to first sc. (40)
Round 6: Ch 1. (Sc in next 4 sts, inc) rep around. Sl st to first sc. (48)
Round 7: Ch 1. (Sc in next 5 sts, inc) rep around. Sl st to first sc. (56)
Round 8: Ch 1. (Sc in next 6 sts, inc) rep around. Sl st to first sc. (64)
Round 9: Ch 1. (Sc in next 7 sts, inc) rep around. Sl st to first sc. (72)
Round 10: Ch 1. (Sc in next 8 sts, inc) rep around. Sl st to first sc. (80)
Round 11: Ch 1. (Sc in next 9 sts, inc) rep around. Sl st to first sc. (88)
Round 12: Ch 1. Sc in each st around. Sl st to first sc. (88)
Optional firming round: If you want an extra sturdy base, work 1 more round of sc in each st around.
2) Transition round
Round 13: Ch 1. *Sc in next st, ch 2, skip 1 st, sc in next st; rep from * around. Sl st to first sc.
Note: With the base as written (88 sts), this lands evenly and gives you 44 ch-2 spaces to work the mesh into. If you changed the base size and your stitch count is different, it is fine to adjust one skip by 1 stitch so the spaces stay fairly even.
3) Mesh body
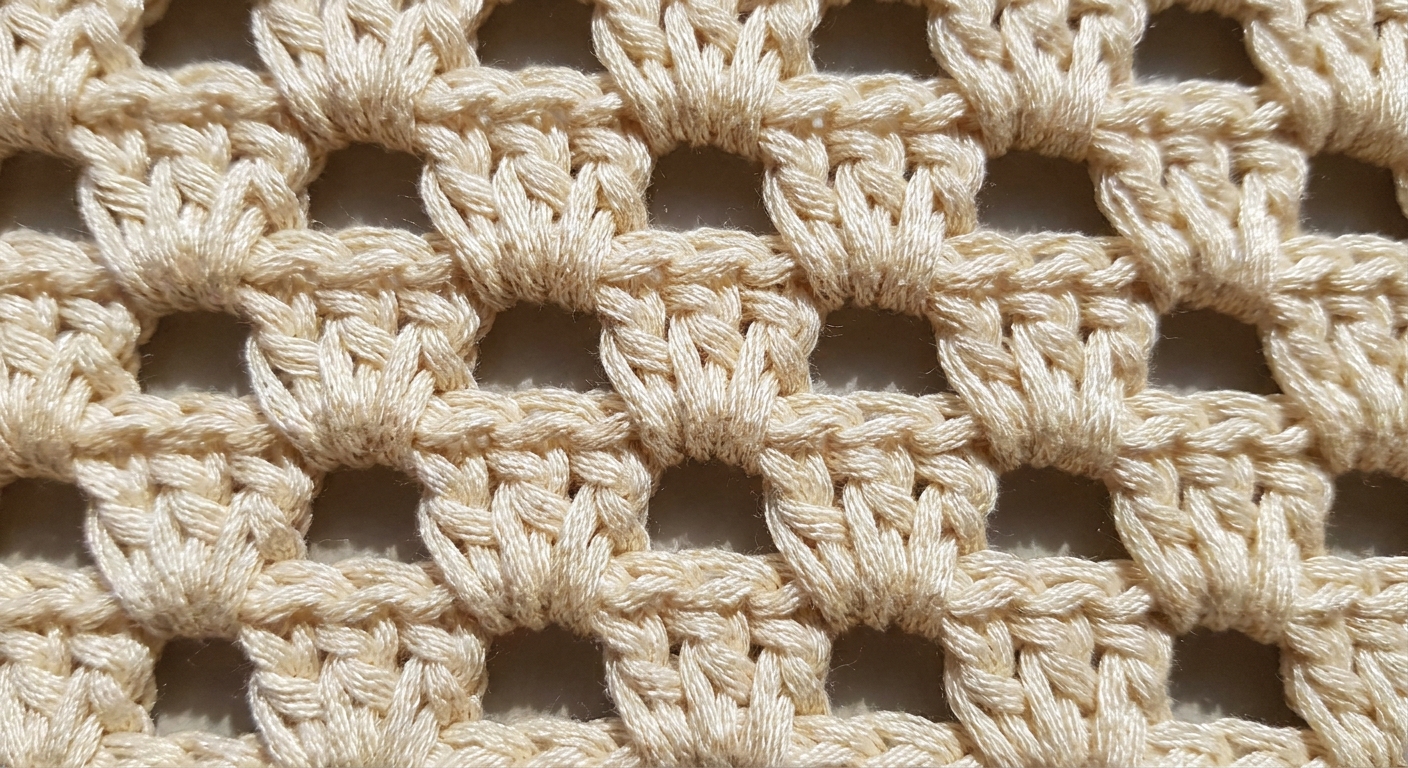
The mesh is worked into the chain spaces. This creates clean, consistent openings and keeps the bag stretchy in the useful way, meaning it expands with groceries but does not permanently distort as quickly.
Round 14: Sl st into the first ch-2 sp. Ch 3 (counts as dc). Work 2 dc in same sp, ch 2. *Work 3 dc in next ch-2 sp, ch 2; rep from * around. Join with sl st to top of beginning ch-3.
Round 15: Sl st into next ch-2 sp. Ch 3 (counts as dc). Work 2 dc in same sp, ch 2. *3 dc in next ch-2 sp, ch 2; rep from * around. Join with sl st to top of beginning ch-3.
Rounds 16 to 26: Rep Round 15.
Adjust height: Add or subtract rounds here to make the bag taller or shorter. For a deeper grocery tote, I like 14 to 16 total mesh rounds. For a farmer’s market tote that stays lighter, 10 to 12 mesh rounds is lovely.
4) Top edge
This is the part that keeps the opening practical. The mesh expands a lot, which is what we want in the body, but the top edge needs a little discipline so it does not flare out like a lampshade.
Cinch Round
Round 1 (cinch): Ch 1. *Sc in next ch-2 sp, ch 1; rep from * around. Join with sl st to first sc. (44 sc + 44 ch-1 sps)
Round 2: Ch 1. Working into the ch-1 sps only, *sc in next ch-1 sp; rep from * around. Join. (44)
Stabilize Round
Round 3: Ch 1. Inc in each st around (2 sc in each sc). Join. (88)
Round 4: Ch 1. Hdc in each st around. Join. (88)
Round 5: Ch 1. Sc in each st around. Join. (88)
Do not fasten off yet if you want to flow right into handle setup.
5) Reinforced handles
We will create two handles opposite each other. You can eyeball it, but I am going to give you an easy counting method too, because nobody needs handle drama.
Handle placement (counts method)
After Top edge Round 5, you should have 88 stitches around the opening.
- Place a marker in your current stitch (your round start).
- Count 22 sts, place a marker. Count 22 sts, place a marker. Count 22 sts, place a marker. You now have four sections of 22 sts.
- Your handles will span two opposite sections. The other two sections will be the sides.
Default handle spans: Skip 22 sts for each handle opening, and crochet the other 22 sts on each side.
Handle Round (create straps)
Round H1: Ch 1, sc in each st to the first marker. Ch 60 (adjust length if desired), skip the next 22 sts (the handle span), sc in the st right after the next marker. Sc in each st across the next side section (22 sts) to the next marker. Ch 60, skip the next 22 sts, sc in the st right after the next marker. Sc in each st to end of round. Join.
Try-on tip: For a hand-carry tote, ch 45 to 50. For shoulder carry, ch 60 to 70 depending on your height and how full you load the bag.
Reinforcement Round
Round H2: Ch 1. Sc in each stitch around. When you reach a handle chain, work sc in each chain across the handle.
Handle tip: If your chains like to twist, work your sc into the back bumps of the chain. It makes a cleaner strap and behaves better long-term.
Optional extra reinforcement: Work one more round of sc around, again placing 1 sc into each handle chain. This makes a noticeably sturdier strap, especially with heavier loads.
Fasten off and weave in ends thoroughly. For a bag that is going to carry weight, I weave ends in at least three directions and tug gently to be sure they are locked.
Make it sturdier
Use a smaller hook for the base
You can work the base with a 4.0 to 4.5 mm hook and switch to a 5.0 mm hook for the mesh body. This gives you a firm floor and a flexible body.
Choose a crisp mercerized cotton
Not all cotton is equal. For totes, I reach for a mercerized cotton that feels slightly crisp in the skein. If it already feels very drapey and stretchy in your hands, the bag will exaggerate that.
Add a slip stitch spine
If you know you will carry heavy items, add a final step: surface slip stitch along the top center of each handle. This creates a subtle reinforcement line that helps reduce handle growth.
Yarn swaps
If you are tempted to swap yarn, here is the honest rundown from someone who has made the swap and then remade the bag.
- Unmercerized cotton: Softer feel, but typically more stretch. Expect longer handles over time unless you reinforce heavily.
- Cotton blends: Cotton acrylic blends can be lighter and springier, but abrasion can fuzz the bag faster.
- Linen or cotton linen: Very strong with low stretch, but can feel stiff on the hands. Gorgeous for a structured tote if you do not mind a firmer fabric.
- Acrylic: Usually too stretchy for a true grocery hauler. It can work for a light market bag, but it tends to grow and can pill.
If you are in a “use what I have” mood, you can also resize the tote by changing yarn weight and hook size, keeping the same construction idea. I walk through that concept in detail here: Resize Amigurumi by Changing Yarn Weight. The math mindset transfers nicely to bags.
Optional: little pocket
Mesh bags are wonderful until your keys decide to go exploring. If you want a tiny spot for keys or a lip balm, crochet a quick flat rectangle (sc rows, about 3 to 4 in wide), then sew it to the inside of the solid base section. Keep it low so it does not distort the mesh.
Care tips
- Wash: Cool to warm water, gentle cycle.
- Dry: Lay flat to dry for best shape control. If you machine dry, use low heat and remove while still slightly damp.
- Reshape: If the mesh gets a little wonky after washing, a quick tug into shape and air dry brings it right back.
Troubleshooting
My bag opening is still flaring
Go down a hook size for the top edge rounds, and make sure you did the cinch rounds exactly as written. Those rounds are what pull the mesh back in.
The mesh holes feel too big
Use ch 1 instead of ch 2 between clusters, or go down a hook size for the body.
The handles still stretch
Add the optional extra reinforcement round, and consider the slip stitch spine trick. Also, even great cotton will relax a bit over time under weight.
More practical crochet
I love projects that earn their keep. If you are on a reusable-gift kick, you might also like my ideas for crochet reusable holiday gift bags. Same “sturdy first” philosophy, just in a different shape.
Happy crocheting, and please remember: if your first tote comes out a little lopsided, it will still carry groceries like a champion. The yarn does not judge, and neither do I.