
Crochet Reusable Holiday Gift Bags

I have a little holiday habit: I tuck a few crocheted gift bags into my wrapping stash so I can skip the frantic last-minute paper hunt. The first year I tried it, I expected them to feel “crafty” in a cute way. What I did not expect was how practical they’d be. Mercerized cotton holds its shape, stays tidy around the top edge, and can be tossed in the wash after a busy season of sticky tags and cookie crumbs.
If you can crochet in the round and you know a basic stitch or two, you can make a stack of reusable drawstring bags that look polished, feel special, and get used again and again.
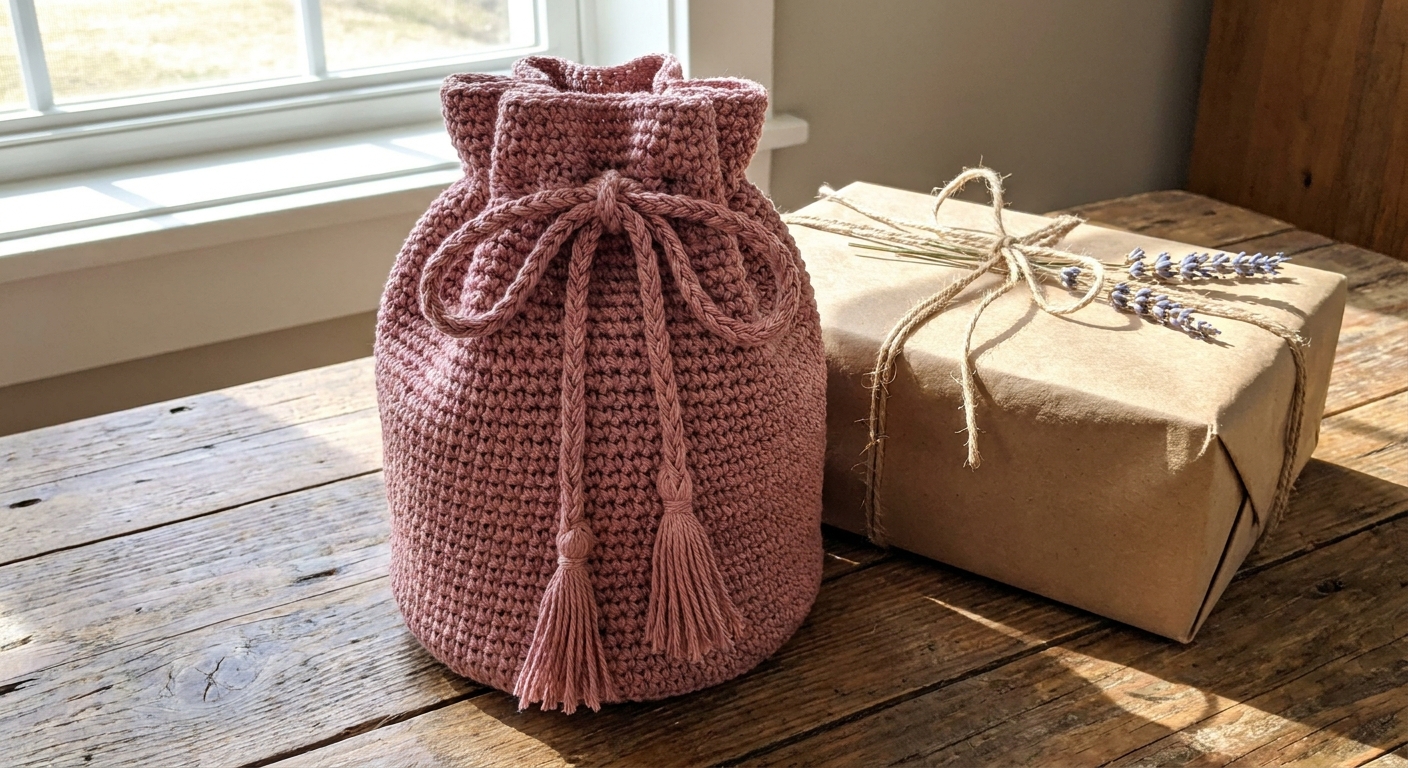
Why I use mercerized cotton
Lots of yarns work for bags, but mercerized cotton is a sweet spot for holiday gift wrapping.
- Durable and washable: Great for years of reuse.
- Crisp stitch definition: Simple stitches look intentional and neat.
- Often feels firmer than many unmercerized cottons: Not because it is “magically non-stretchy,” but because many mercerized yarns are smoother and tightly plied, which helps the bag keep its shape.
- Easy to thread: Drawstrings glide smoothly through chain spaces.
If you are yarn shopping, look for a smooth cotton with a slight sheen labeled “mercerized.” It is commonly sold in DK, worsted, and crochet thread weights.
Supplies (keep it simple)
- Mercerized cotton yarn (DK or worsted are easiest for gifts)
- Hook sized to your yarn label recommendation (or one size smaller for a denser fabric)
- Scissors
- Tapestry needle
- Optional: stitch marker for working in continuous rounds
One helpful habit before any batch project: jot down your yarn, hook, and intended sizes on a quick project card so you can replicate bags later without guessing. I walk through my own system here: Make a Project Card Before Starting Crochet.
A quick fabric check
For gift bags, I aim for a fabric that feels firm in your hands. If you can easily poke a finger through your single crochet fabric (when you are not intentionally doing mesh), go down a hook size. A slightly denser bag looks cleaner and wears better, especially around the drawstring area.
Pick your bag style
Both styles are festive. The choice depends on what is going inside.
Solid
Use mostly single crochet or half double crochet. Great for gift cards, jewelry boxes, lip balms, and anything you do not want peeking through.
Lacy
Use granny-style mesh or chain spaces. These fly off the hook and are wonderful for oddly shaped gifts like plushies, ornaments, or a bundle of socks.
Core pattern: drawstring gift bag
This is my “one pattern, any size” approach. You will choose a base size, crochet straight up, then add a clean drawstring channel and a sturdy top edge.
Stitches used
- ch = chain
- sl st = slip stitch
- sc = single crochet
- hdc = half double crochet
- dc = double crochet
Step 1: Start the base (three size options)
You can begin with a flat circle for a round-bottom bag (my favorite) or a rectangle for a boxier base. Round bottoms are forgiving and quick, so that is what I’m sharing here.
Round base with dc (easy and stable):
- Round 1: Make a magic ring, ch 3 (counts as dc), work 11 dc into ring. Join with sl st to top of beginning ch 3. (12 dc)
- Round 2: Ch 3, dc in same stitch, 2 dc in each stitch around. Join. (24 dc)
- Round 3: Ch 3, dc in same stitch, dc in next stitch, repeat around. Join. (36 dc)
- Round 4: Ch 3, dc in same stitch, dc in next 2 stitches, repeat around. Join. (48 dc)
- Round 5: Ch 3, dc in same stitch, dc in next 3 stitches, repeat around. Join. (60 dc)
Stop point guide (measure your circle):
- Small bag base: stop after Round 3. Often lands around 4 to 5 inches across, but measure your actual circle.
- Medium bag base: stop after Round 4. Often around 5.5 to 7 inches, depending on yarn, hook, and tension.
- Large bag base: stop after Round 5. Often around 7 to 9 inches. Again, let your measuring tape be the boss.
Tip for neat sides: The next round is where you “turn the corner” from base to body. Working that round in the back loop only gives you a crisp ridge that looks tailored.
Step 2: Turn the corner
Ch 1, sc in each stitch around in the back loop only. Join with sl st to first sc.
If you plan to switch to continuous rounds later: I recommend keeping this BLO round joined so the ridge stays even. If you do work it continuously, place a marker at the start of the round so the ridge does not drift.
Step 3: Crochet the body
Continue in joined rounds, or switch to continuous rounds if you prefer. If you switch to continuous rounds, use a stitch marker and move it up each round.
Option A: Solid body (sc or hdc)
- SC fabric: ch 1, sc in each stitch around, join. Repeat until the bag is about 1.5 inches shorter than your desired finished height.
- HDC fabric: ch 2, hdc in each stitch around, join. Repeat until the bag is about 1.5 inches shorter than your desired finished height.
Option B: Lacy body (simple mesh)
This creates small windows while still holding shape. It works best with an even stitch count, which you will have if you used the base rounds above.
- Mesh Round: ch 4 (counts as dc + ch 1), skip 1 stitch, dc in next stitch, ch 1, repeat around. Join with sl st to the 3rd chain of beginning ch 4. Note: If you reach the end and the spacing feels off by one stitch, it is fine to skip 0 once at the end so your join stays tidy.
- Next Round: sl st into the first ch-1 space, ch 3 (counts as dc), ch 1, dc in next ch-1 space, ch 1, repeat around. Join to the top of the beginning ch 3.
Repeat these two mesh rounds until the bag is about 1.5 inches shorter than your desired finished height.
Step 4: Make the drawstring channel
The channel needs a clear path for the cord. You can do this even on solid fabric.
- Channel setup round: ch 1, sc in first stitch, ch 1, skip 1 stitch, sc in next stitch repeat around. Join.
- Reinforce round: ch 1, sc in each stitch and each chain space around. Join.
Step 5: Finish the top edge
Work 1 to 2 rounds of sc for a firm rim:
- Ch 1, sc in each stitch around. Join.
- Repeat once more if you want a sturdier top.
Step 6: Add the drawstring
You have two easy choices.
Option A: Crochet chain cord
Ch a cord about 2 to 2.5 times the bag circumference. Fasten off and weave in the end. For a thicker cord, make a long chain, then sl st back down the chain. If it feels too long after threading, you can trim and re-fasten off.
Option B: Romanian cord or i-cord
These take longer but feel luxurious. Use them if you are making a “forever” bag for heavier gifts.
Thread the cord through the channel, weaving in and out of the chain spaces. Tie the ends together, or leave them separate for a bow.
How to size it
I size gift bags the same way I size hats: I measure the thing going inside.
- Width: your base diameter should be about the gift width plus 1 inch of ease.
- Height: crochet until the bag reaches the gift height plus 1 to 2 inches, then remember the drawstring channel will eat a little height when cinched.
If you are crocheting a batch, make one “tester” bag in the medium size. After you like the feel of the fabric and the channel, repeating it is wonderfully mindless.
Yarn amount (rough guide)
Yarn use varies a lot with stitch choice, hook size, and height, but these ranges are a helpful starting point for batching:
- Small: about 20 to 40 g
- Medium: about 40 to 80 g
- Large: about 70 to 130 g
If you are using mesh, you will land on the lower end. If you are making a tall, dense sc bag with extra top rounds, expect the higher end.
Finishing touches
Weave ends well
On gift bags, ends get tugged more than you think. Weave through multiple directions, and avoid leaving tails near the drawstring channel where they can catch.
Add a gift tag loop
Before fastening off, ch 12 to 18, sl st back into the same stitch to form a loop. You can tie a tag or a sprig of greenery through it.
Stop the top from flaring
If your top looks wavy, drop down one hook size for the last 2 rounds of sc. Mercerized cotton is obedient, but it will show extra looseness at the rim.
Care: wash, reshape, reuse
One reason I love cotton gift bags is that they are low drama, as long as you treat color and shrinkage with a little respect.
- Washing: cool water is the safest default. If your yarn label is more specific, follow that. For richly dyed cotton, it is smart to test for colorfastness the first time.
- Drying: lay flat to dry for best shape, especially for lacy bags. A quick reshape with your hands goes a long way.
- Storage: I store mine nested by size with the drawstrings tucked inside so they do not tangle.
Eco-friendly wrapping ideas
- Use the bag as part of the gift: pair a small bag with homemade ornaments or candy.
- Make a set: three nested bags tied together makes a sweet present for a crafter.
- Seasonless colors: cream, navy, forest green, and cranberry look festive without screaming one holiday only.
If you want more cozy seasonal makes to pair with your gift bags, our holiday craft hub is a nice place to browse: Holiday Crafts Guide.
Troubleshooting
My bag is too floppy
- Go down one hook size.
- Switch the body to sc or hdc instead of mesh.
- Add one extra sc round at the top edge.
My drawstring will not pull smoothly
- Make sure your channel has true openings (chain spaces) and you are not piercing yarn strands.
- Use a smoother cord (a simple crochet chain works surprisingly well).
- Thread with a blunt tapestry needle, not a sharp one, to avoid splitting cotton plies.
The bottom puckers
- Your base needs one more increase round, or your tension is tight. Add a round following the same increase pattern.
- If it only puckers slightly, blocking helps. Lightly dampen and flatten the base to dry.
Small idea, big payoff
Reusable gift bags are one of those projects that feel gentle while you make them and quietly impressive when you hand them over. And the best part is what happens after the holiday rush: you get them back, wash them, fold them, and the next season you are already ahead.
If you want to peek at more of my crochet corner, you can find my author page here: Lucy Campbell.