
Holiday Bunting Garland With Mini Skeins

I love advent calendar minis, but I do not love the way they breed in a basket after the holidays. Every year I swear I will use them up, and every year I end up with a rainbow of tiny skeins that are each too cute to toss and too small for a “real” project.
This bunting garland is my favorite solution. It works up fast, it forgives wonky bits, and it is the perfect playground for practicing clean color changes because each flag is small enough to redo without heartbreak. Hang it on your mantle, across a bookcase, along a stair rail, or around a doorway, and suddenly those minis look like you planned it all along.
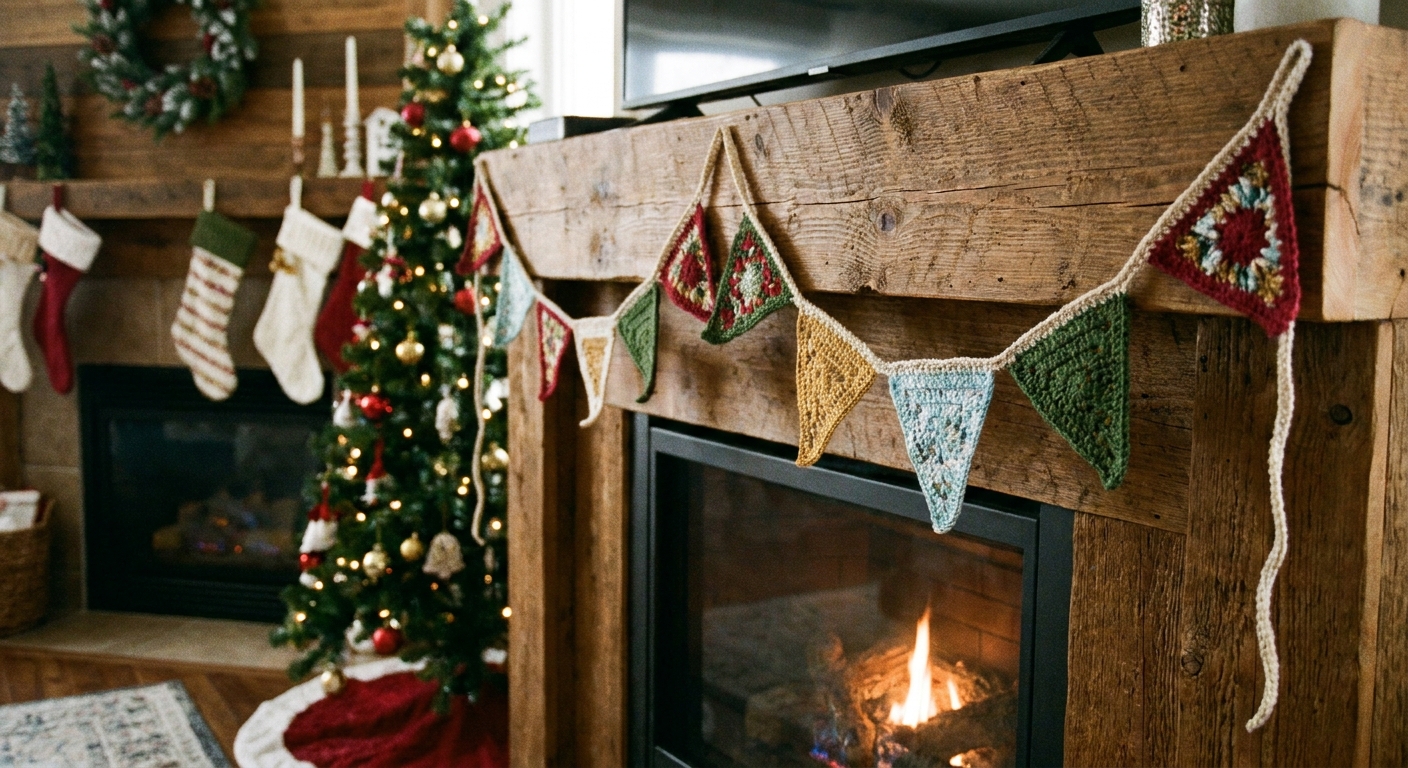
What makes mini skeins perfect for bunting
Mini skeins shine when you give them a job that matches their scale. Bunting checks all the boxes:
- Small repeats: Each flag uses a little yarn, so you can feature lots of colors without committing to a whole blanket.
- Flexible palette: Traditional red and green is lovely, but so is icy blue and silver, jewel tones, or a gentle neutral set with one pop color.
- Built-in “stash control”: You can set a rule like “one flag per mini” or “two flags per mini” and actually see the pile shrink.
- Great technique practice: Color changes, weaving ends, and keeping edges tidy are easier to master in small pieces.
If you want more holiday crochet ideas that play nicely with limited yarn, I keep a running list in our Holiday Crafts guide.
Supplies and yarn notes
Yarn
Any yarn weight works, but your garland will look best if all flags are made in the same weight and fiber type. Mini skeins vary a lot, so I like to sort them into “families” first.
- Recommended: Worsted weight (Category 4) or DK (Category 3) minis for crisp triangles that do not flop.
- If your minis are mixed weights: Either commit to one weight for the flags and use the rest for tassels, pom poms, or the hanging cord, or hold thinner yarn double to approximate the thicker yarn.
- Safety note: Keep all yarn decor well away from open flames and heat sources. If this is going near a fireplace, follow the manufacturer’s clearance guidance and choose a placement that stays cool to the touch.
Hook and notions
- Crochet hook that suits your yarn (for worsted, I start with 5.0 mm/H)
- Scissors
- Tapestry needle
- Measuring tape (helpful, not required)
- Optional: blocking mat and pins, or a towel plus rust-proof pins
How much yarn do you need?
As a ballpark, a single triangle flag in worsted weight usually takes only a few grams. Minis in the 10 g to 20 g range can often make multiple flags, depending on your size. The easiest approach is to choose a flag size, make one test flag, then weigh it if you have a kitchen scale. If not, just crochet until the mini says “uncle,” but leave enough yarn to weave in ends without a wrestling match.
Pick your bunting style
Before you crochet a dozen flags, decide what look you want. Here are three reliable options.
1) Classic triangle flags (my go-to)
Triangular flags read as “bunting” instantly and line up neatly along a cord.
2) Pennants (tall and narrow)
These are great if your minis are very small, because the flags look intentional even when they are shorter.
3) Peppermint stripe flags (color-change practice)
Work each flag in 2 colors with 2 to 4 stripes. This is where we practice seamless color changes.
Stitches and abbreviations
Abbreviations are US terms.
- ch = chain
- sc = single crochet
- hdc = half double crochet
- dc = double crochet
- sl st = slip stitch
- st(s) = stitch(es)
Skill level: Confident beginner and up. If you can chain, single crochet, and double crochet, you are in great shape.
Base pattern: easy triangle flag (worsted or DK)
This makes a slightly “chunky,” cozy triangle that reads well from across the room. Adjust hook size to get fabric that is not lacy and not stiff.
Flag instructions
- Ch 17.
- Row 1: Sc in 2nd ch from hook and in each ch across. (16 sc) Ch 1, turn.
- Row 2: Sc2tog over first 2 sts (a decrease), sc across until 2 sts remain, sc2tog over last 2 sts. (14 sc) Ch 1, turn.
- Repeat Row 2 until you have 2 sts left.
- Last row: Sc2tog. (1 st)
- Fasten off leaving a 10 in to 12 in tail for sewing to a cord if you want, or a shorter tail if you plan to crochet-join and weave now.
Sample size (for planning)
With worsted yarn and a 5.0 mm/H hook, this Ch 17 flag typically lands around 5 in wide at the top and 6 in tall, give or take depending on your tension.
Optional border (extra finished look)
If you want tidier edges, join yarn at any corner and sc evenly around the triangle. At the pointy corners, work 2 to 3 sc in the same stitch or space as needed so it stays flat (if it ripples, use fewer; if it curls, use more). Sl st to join, fasten off.
Size adjustments: Start with a longer chain for bigger flags. Keep the same decrease rhythm, 1 decrease at each end of every row, and the triangle will scale up cleanly.
My tidy, nearly invisible color change
When stripes look messy, it is usually because the color change happened in the wrong spot. My favorite clean method is to change colors on the last yarn over of the last stitch in the old color.
How to do it in single crochet
- Work the last sc of the row until you have 2 loops on the hook.
- Drop the old color (do not cut yet).
- Yarn over with the new color and pull through both loops to finish the sc.
- Ch 1 and turn using the new color.
How to do it in double crochet
- Work the last dc of the row until you are at the final step, with 2 loops left on the hook.
- Yarn over with the new color and pull through those last 2 loops to finish the stitch.
Should you carry the yarn or cut it?
- Carry it when stripes are close together (for example, every 2 rows). On a small flag, the carried strand can be hidden on the wrong side and later covered by how you attach it to the cord.
- Cut it when stripes are far apart or when the carried strand would show at the edge. Minis are precious, but your sanity is too.
If you want a more general refresher on planning yarn usage before you commit, my “make it easy on future you” habit is to jot notes on a little project card. I walk through that idea here: Make a project card before starting crochet.
Assembly: crochet cord method
This is the method I use most often because it is sturdy and lets you space flags evenly as you go. It also means the cord is not a separate piece. The stitches you work along the tops of the flags become that section of the cord.
Step 1: Start the hanging cord
- With a coordinating yarn (I like a neutral), ch 60 to start.
- Decide your spacing style:
- No gaps: Attach flags edge-to-edge for a dense, festive look.
- Small gaps: Ch 3 to ch 6 between flags.
- Wide gaps: Ch 8 to ch 12 between flags, especially if your flags are larger.
Step 2: Join a flag and keep the cord going
Hold the first flag with the top edge facing you. If you worked your flag in rows, you will be working into the top row stitches for the neatest look.
- After your starting chain, sl st into the top left corner stitch of a flag (or any top corner).
- Ch 1, then work sc across the top edge of the flag, placing 1 sc in each stitch across that top row.
- When you reach the other top corner, sl st into the corner stitch to secure.
- Ch your gap (or not), then repeat with the next flag.
If your top edge does not have obvious stitches: Some flags end up rotated or you might be looking at row ends. In that case, just work sc evenly across the top edge, aiming for the same number of sc on each flag so they hang consistently.
Step 3: Finish the cord
After the last flag, ch 60 again (or whatever length you want for tying). Fasten off and weave in the end.
Tip from my own mantle: Longer tie ends make it much easier to drape the garland exactly where you want it, especially if you are tying to stocking holders or a shelf bracket.
Assembly: thread-and-needle method
If you already made a pile of flags, you can string them like beads.
- Make a long chain cord: ch to your desired length, then sl st back along the chain for a firmer cord.
- Use a tapestry needle to stitch each flag to the cord along the top edge. I take small whip stitches through the top row of the flag and around the cord.
- Space flags evenly, then weave in all ends.
Blocking and finishing touches
You can absolutely skip blocking, especially if you like a cozy, handmade look. If you want crisp, photo-ready bunting, block the flags before assembly.
- For wool or blends: Light steam blocking (hover, do not press) works well.
- For acrylic: Use gentle steam carefully. Acrylic can relax beautifully, but too much heat can flatten stitches permanently.
- For cotton: Wet block and pin to shape. Cotton loves a good pinning session.
Optional extras
- Tassels: Add tassels to the bottom point of each triangle using mini leftovers.
- Pom poms: One small pom pom per flag gives a playful vibe.
- Beads: If you add beads, keep them away from spots where little hands or pets can reach.
Planning your length
If you want a quick way to avoid the classic “I made 7 flags and ran out of wall” problem, here is my lazy math:
- Count your flags: For the sample flag size above (about 5 in wide), 10 to 12 flags makes a nice statement on many mantles.
- Estimate finished length: (flag width × number of flags) + (gap × number of gaps) + (tie ends). If you use 12 flags at 5 in wide with 3 in gaps, that is about 12×5 + 11×3 = 93 in, plus tie ends.
- Adjust without stress: If it is too long, remove a flag. If it is too short, add a couple flags or reduce the gap chains.
Ends without the drama
Mini skeins love to multiply your tails. Two strategies that keep me from muttering at my own craft:
- Weave as you go: After every 2 to 3 flags, stop and weave those ends before they become a whole personality.
- Hide with intent: If you are doing stripes and carrying yarn, keep carried strands on the back. The cord-join method can cover a surprising amount along the top edge.
Color palettes that look intentional
If you are staring at 24 minis and feeling decision fatigue, try one of these easy formulas:
- Classic: red, green, cream, gold
- Nordic winter: cream, gray, navy, cranberry
- Candy bright: red, hot pink, mint, white
- Modern neutral: oatmeal, taupe, charcoal, one accent (berry or forest)
- Scrappy rainbow: arrange flags from light to dark, or warm to cool
When in doubt, repeat one “anchor” color every 3rd or 4th flag. Repetition is the secret sauce that makes scrappy look curated.
Troubleshooting
My flags are curling
Curling is usually a tension issue or a hook size mismatch. Go up a hook size, or add the optional sc border to stabilize the edges. Blocking also helps.
My triangle looks lopsided
Count your stitches after each decrease row. It is easy to miss a sc2tog at one end when you are chatting or watching a holiday movie.
The top edge is wavy when attached
You might be working too many sc across the top. Aim for one sc per stitch along the top row. If the top edge is not stitchy enough to clearly see, place stitch markers at each corner and in the middle before attaching.
I have a million ends
Welcome to the mini skein life. If ends stress you out, choose one color per flag and skip stripes, or carry yarn up the side and hide it under the border round.
Motifs instead of flags
If triangles are not your thing, you can use this same cord method to attach small motifs. A garland of stars, hearts, or snowflakes is adorable with minis. If snowflakes call to you, you might like my notes on thread sizing and stiffening here: Crisp crochet snowflake ornaments: thread size and starching.
Quick checklist
- Choose a yarn weight family and hook.
- Pick a flag size (start chain length).
- Decide: solid flags or striped flags.
- Make 1 test flag, then commit.
- Crochet flags assembly-line style.
- Attach to a cord with consistent spacing.
- Hang it up, step back, and let “perfect” go on vacation.
If you are in a last-minute gifting mood, these quick projects pair nicely with mini skeins too: 10 last-minute holiday crochet gifts in super bulky yarn.