Breathable Bamboo Summer Tank Top Crochet Pattern

The first time I crocheted with bamboo, I remember thinking, oh, this is going to be floaty and breezy, and then promptly watching my stitches slide right off my hook. Bamboo can feel a little mischievous at first, but once you understand its drape and slipperiness, it makes the kind of summer fabric you actually want to wear. This tank is built for that: open, breathable stitches, a calm fit (not clingy), and simple shaping that stays friendly across sizes.
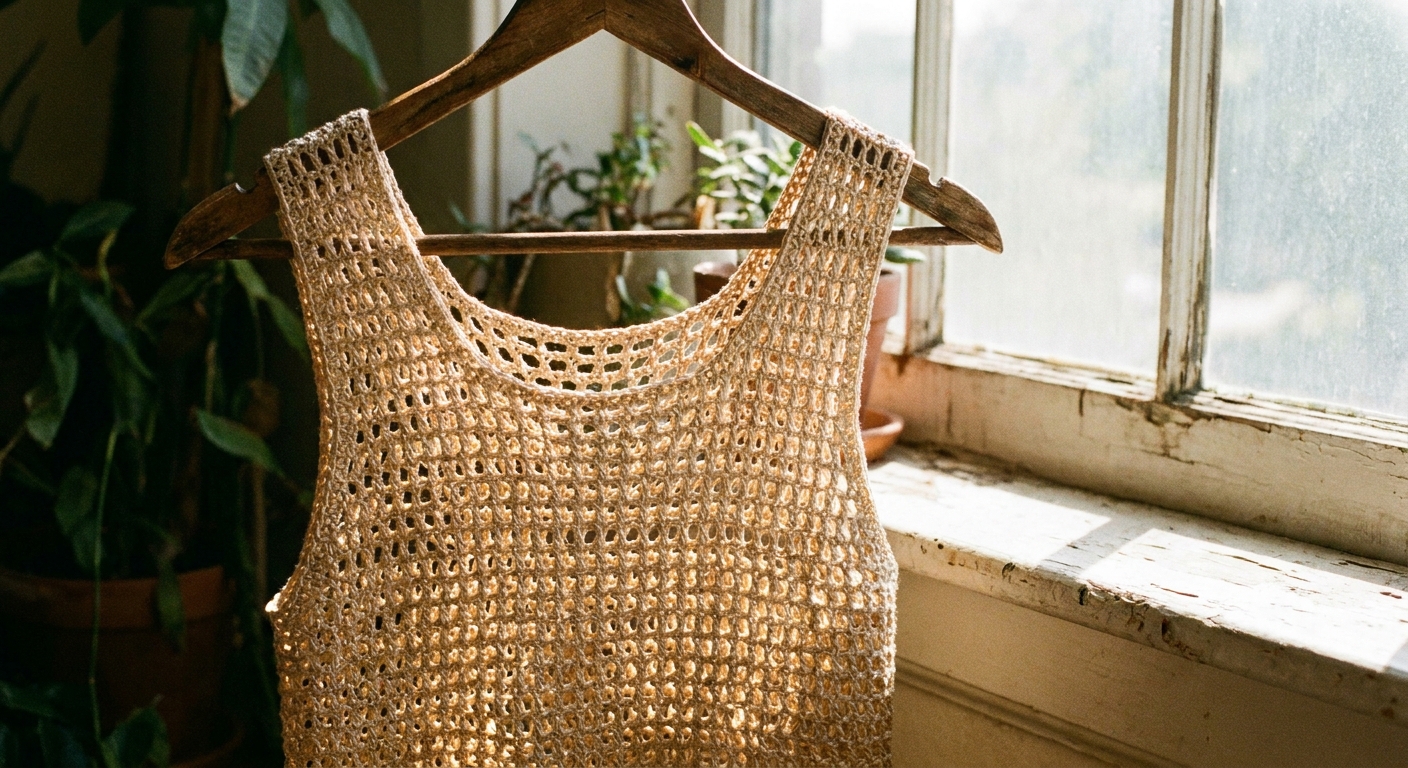
You can make this as a classic scoop-neck tank, or tweak it into a slightly longer tunic with side slits. I will walk you through both, plus the small handling tricks that keep bamboo from stretching into a beach cover-up when you wanted a top.
Pattern overview
- Style: Simple, breathable summer tank with optional side slits
- Construction: Bottom-up, in the round to underarms, then front and back worked flat; joined at shoulders; straps added last
- Fit: Easy fit with gentle shaping at armholes
- Skill level: Confident beginner
- Key stitch pattern: Mesh (double crochet, chain spaces)
- Why bamboo: Cool hand, beautiful drape, and a soft swing that makes simple stitches look polished
If you are newer to garment patterns, you might like skimming my general approach in Guide to Crochet Patterns first. I also strongly recommend making a quick project card before you start so you can track hook size, row counts, and modifications. I keep mine tucked right into the yarn cake. Here is how I do it: Make a Project Card Before Starting Crochet.
Materials
Yarn
Bamboo yarn, DK or light worsted (#3) is ideal. In practice, many yarns labeled “bamboo” are bamboo-derived regenerated cellulose (often rayon, viscose, or lyocell) rather than a bast-style plant fiber you spin like cotton. Check the label for the exact fiber wording. Either way, you get that signature drape and cool feel. Bamboo blends like bamboo cotton and bamboo linen can add structure.
- Amount: 750 to 1700 yards (685 to 1555 m), depending on size and length
- Suggested yardage by size (approx.): XS 750, S 850, M 950, L 1100, XL 1250, 2X 1400, 3X 1550, 4X 1700
Note: Bamboo often feels heavy for its thickness and it can grow with wear, especially in open stitches. If you are between skeins, get the extra. I would rather have leftover yarn than a tank that stops at ribcage height.
Hook and notions
- Hook: 4.0 mm to 5.0 mm (choose the size that meets your gauge after washing and drying your swatch)
- Stitch markers (at least 4)
- Tapestry needle
- Measuring tape
- Optional: 2.5 mm to 3.5 mm hook for neckline and armhole edging (helps prevent stretching)
Optional tools that make bamboo easier
- Wood or bamboo hook if you find your stitches sliding too much on metal
- Pointed-tip needle for weaving ends through slippery fibers
Sizes and measurements
This is a custom-fit recipe with size guidance. You choose a target finished bust, crochet the body to your underarm, then shape the top to suit your shoulders and neckline. I am giving you clear math and a worked example so you are not guessing.
Choose your size
Pick the size based on your full bust measurement, then add ease:
- Recommended ease: 2 to 6 inches (5 to 15 cm)
- More ease gives a swingy, breathable tank.
- Less ease gives a closer fit, but bamboo can still relax with wear.
Target finished bust (inches)
- XS: 30 to 32
- S: 34 to 36
- M: 38 to 40
- L: 42 to 44
- XL: 46 to 48
- 2X: 50 to 52
- 3X: 54 to 56
- 4X: 58 to 60
Other handy targets
- Armhole depth: about 7 to 9 inches (18 to 23 cm) from underarm to shoulder for many adults, adjust to your comfort
- Front neckline depth (scoop): about 5 to 7 inches (13 to 18 cm) from shoulder edge at the strap inward
- Strap width: about 1 to 2 inches (2.5 to 5 cm)
Length: Crochet to your preference. A common tank length is 21 to 25 inches from shoulder to hem, but you can absolutely make it cropped or tunic-length.
Gauge
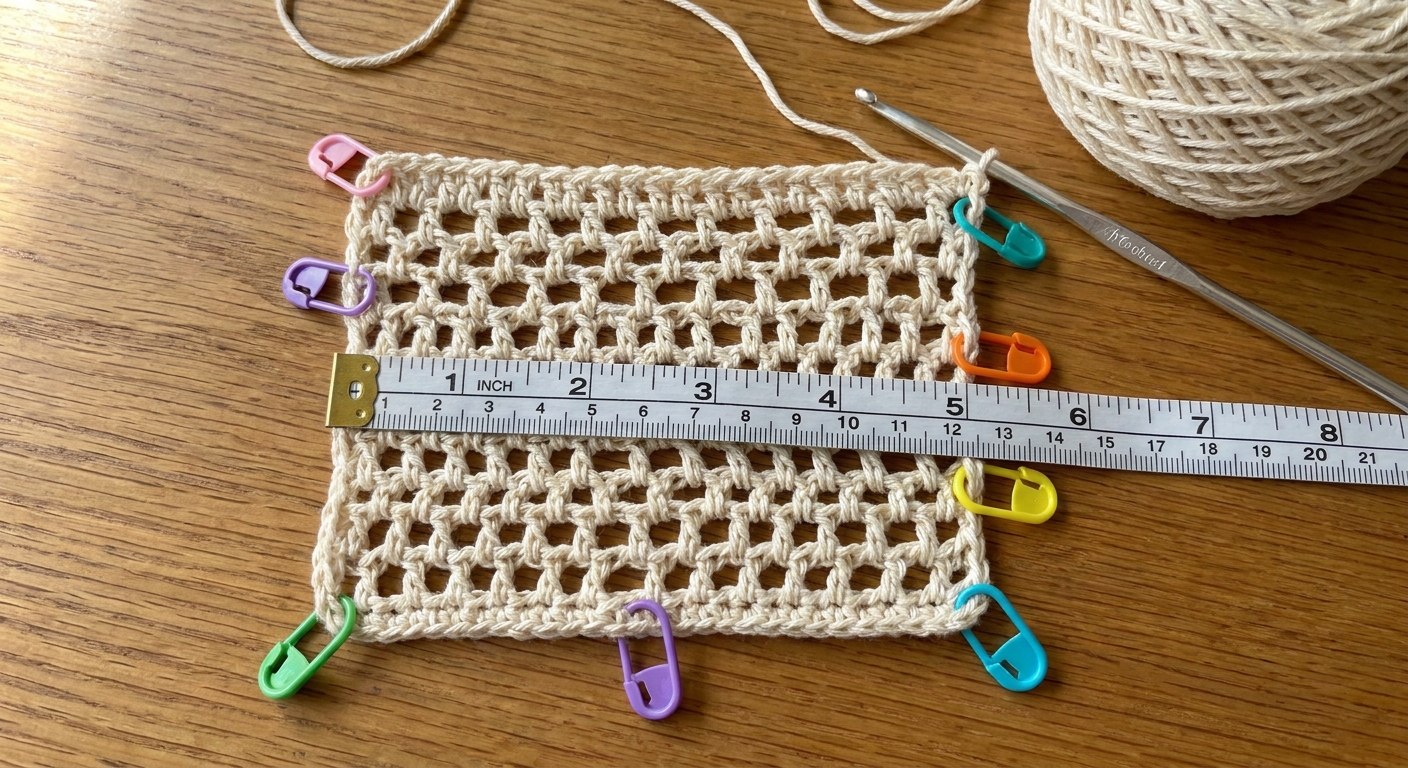
Measure gauge after washing and drying your swatch. Bamboo relaxes. If you only measure fresh off the hook, your finished tank can end up wider and longer than planned.
Swatch stitch pattern
Work the mesh stitch pattern described below for at least a 6 inch square, then wash and dry it the way you will launder the finished tank. Measure after it is fully dry and relaxed.
Reference gauge
- About 16 dc posts and 9 rows = 4 inches (10 cm) in mesh pattern, after blocking (count dc posts only, not chain spaces)
That gauge is only a reference point. This pattern uses your blocked stitches-per-inch to calculate the foundation and panel counts.
Abbreviations and stitches
- ch = chain
- sl st = slip stitch
- sc = single crochet
- dc = double crochet
- sk = skip
- sp = space
- st(s) = stitch(es)
- RS/WS = right side/wrong side
Special stitch
Mesh (multiple of 2): dc, ch 1, sk 1 repeat. Work dc into dc on the next round or row, and ch 1 over each ch-1 space.
Notes
- If you dislike a tall turning chain, use a standing dc at the start of rounds or rows. If you do use a turning chain, ch 3 counts as a dc.
- Turn at the end of rows for the front and back panels.
Before you start
- Swatch larger than you think you need. Bamboo changes after washing. I wash my swatch the same way I plan to wash the top.
- Use stitch markers. Bamboo makes it easy to accidentally add a stitch because everything looks fluid. Mark the first stitch of rounds and your side split points.
- Do not yank to tighten stitches. Keep your tension calm and consistent. Bamboo remembers being stretched.
- Edge control matters. We will add simple edging at the end to help the neckline and armholes keep their shape.
The pattern
Step 1: Foundation and hem
Hem fit note: If you want the hem to hug in (helpful with bamboo), use a hook 0.5 mm smaller for the hem rounds only. If you want it straight, use your main hook.
Foundation chain: Chain an even number that matches your target finished bust circumference. Join with a sl st to the first chain, being careful not to twist.
Easy sizing math:
- Decide your finished bust (your bust measurement + ease).
- From your blocked swatch, calculate dc posts per inch in the mesh pattern.
- Target even stitch count = finished bust inches × dc posts per inch, rounded to the nearest even whole number.
Worked example: If your blocked gauge is 4 dc posts per inch and you want a 40 inch bust, 40 × 4 = 160. Chain 160 and join.
Important transition note: The foundation chain becomes a tidy base after you sc into it. Your mesh round is worked into the sc round (not directly into raw chains), and your mesh count checkpoints are based on that.
Round 1 (hem): ch 1, sc in each ch around. Join with sl st to first sc. (Place a marker in first sc.)
Round 2 (hem): ch 1, sc in each st around. Join.
Repeat Round 2 until hem is about 1 inch (2.5 cm) tall.
Step 2: Body mesh (in the round)
This setup is where mesh patterns love to play tricks. The goal is to end up with one dc in every other stitch, with a ch-1 space between them, and no accidental increases.
Setup round: ch 4 (counts as dc + ch 1), sk next st, dc in next st, ch 1, sk next st repeat around.
What should happen at the end: Because you started with an even number of stitches, you will finish with a ch 1 and the very last stitch will be skipped. That is correct for this mesh.
Join: sl st into the 3rd ch of the beginning ch-4 (this is the top of the beginning dc). Do not join into the ch-1 space.
Checkpoint: After the setup round, you should have foundation stitch count ÷ 2 dc posts around. Example: if you started with 160, you should see 80 dc posts around.
Next rounds: ch 4 (counts as dc + ch 1), then work dc in next dc, ch 1 (over the next ch-1 sp) repeat around. Join with sl st into the 3rd ch of the beginning ch-4 (top of the beginning dc).
Continue until the body measures about 11 to 14 inches from hem (or to your underarm).
Step 3: Split for front and back
For counting, count dc posts only in your mesh round (ignore the chain spaces). That dc count is half of the stitch count you started with, and it stays consistent from round to round.
- Place a marker at the start of the round.
- Count half your dc posts, then place a second marker halfway around.
Checkpoint: Each half (front and back) should have the same number of dc posts. Example: if you have 80 dc posts total, each panel begins with 40 dc posts.
Next row (split row): Work in mesh from marker to marker, and stop after completing the last dc before the second marker. You want the edge of your flat panel to end on a dc post, not on a loose trailing ch-1 space.
You will now work flat for the back panel first (or front first, your choice).
Step 4: Back panel
Row 1: Turn. Work mesh across.
Armhole shaping: You will remove one mesh repeat at each edge on selected rows. Keep it gentle. Bamboo drapes, so you do not need aggressive shaping.
Decrease row rule (both edges):
- At the start: Begin your mesh one dc in from the edge by skipping the first dc post of the previous row. In practice: make your first dc in the second dc of the row below, then continue mesh.
- At the end: Stop one mesh repeat early so you also remove one repeat at the far edge. In practice: work your last dc into the second-to-last dc of the row below, leaving the final dc unworked.
Small edge note for decrease rows: On a decrease row, your first stitch is a dc into that second dc post, and you will still place a ch 1 over each ch-1 space as you go. The important part is that you have one fewer dc post at that edge when the row is done.
Even row: Work mesh normally, edge to edge.
Work 2 to 4 decrease rows total (spread them out every other row, or as needed) until the width across the back between armholes feels right. Then work even until the back panel measures about 7 to 9 inches from underarm to shoulder.
Step 5: Front panel
Attach yarn at the other underarm marker. Work the front panel flat the same as the back for the armhole shaping.
Scoop neckline
When the front panel is about 2 inches shorter than the back panel, start the neckline.
How wide should the front neck opening be? A simple, reliable rule is to reserve about 30% to 40% of the panel dc posts for the neck opening.
- Example: If your front panel has 80 dc posts, 30% to 40% is 24 to 32 dc posts for the center opening.
- Mark the center of the panel. Count out your opening width and place markers on each side of that center section.
Neckline setup row: Work mesh to the first neck marker, then stop after a dc and turn. You will work one shoulder at a time.
Neckline shaping: On the neckline edge only, work a decrease row every row or every other row (using the same decrease rule as the armhole edge, but only on the neckline side) until you have a comfortable curve and enough stitches left for your strap width. Work the outer armhole edge even unless you still need armhole depth.
Second shoulder: Skip the marked center neck stitches, join yarn at the other side, and mirror the shaping.
Higher neckline option
If you want more coverage, skip most neckline shaping and keep the opening smaller. Bamboo can relax with wear, so when in doubt, start a little higher than you think you need.
Step 6: Join shoulders
With RS facing, align front and back at the shoulders. Join each shoulder with either:
- Slip stitch seam through both layers (neat, flexible), or
- Whip stitch with a tapestry needle (softer and nearly invisible)
Leave the center opening for the neckline.
Step 7: Straps
I like straps you can fit on your body instead of straps that demand you match an exact number in a book.
- Try the tank on and decide where you want the straps to sit.
- Mark strap positions on the front and back (symmetrical). Aim for straps that land comfortably outside your bra strap line, if that matters to you.
- Attach yarn at a front strap marker.
- Strap row: Work 6 to 10 dc (about 1 to 2 inches wide). Turn.
- Next rows: Work dc rows (or sc rows for extra firmness) until the strap reaches the back strap marker without pulling. Use a standing dc or ch 3 at the start of dc rows, then dc across.
- Join strap to the back with slip stitches or sewing.
- Repeat for the second strap.
Anti-stretch tip: For bamboo, I often go down a hook size for straps, or I do straps in sc. It keeps them from lengthening mid-summer.
Step 8: Neck and arm edging
This edging is simple, but it is the difference between “pretty for five minutes” and “pretty all summer.”
Round 1: With a smaller hook if desired, attach yarn at a shoulder seam. Work sc evenly around neckline. When working into mesh, place sc into each dc post and 1 sc into each ch-1 space, adjusting as needed to lie flat. Join.
If it ripples: Skip a chain space occasionally. A good starting point is to skip every 5th to 7th ch-1 space (still sc into every dc post). Bamboo plus a firm edging can ruffle if you pack in too many stitches.
Round 2: ch 1, sc in each st around. Join and fasten off.
Repeat the same 2 rounds for each armhole.
Step 9: Weave ends and block
Weave ends with a long path and a few direction changes. Bamboo can be slippery, so I avoid short, lazy weaves.
Blocking: Wet block or steam lightly, then lay flat to measurements. Do not hang to dry. Bamboo can lengthen under its own weight.
Customization
Cropped version
Stop the body 2 to 4 inches sooner and keep the hem band snug. Bamboo drape plus short length is very cute, very wearable.
Side slits
Work in the round for 4 to 6 inches, then switch to working flat for front and back separately to create side openings. Keep the mesh aligned so the fabric looks continuous.
Light waist shaping
If you like gentle shaping, do two decrease rounds at the waist (each removes 2 to 4 mesh repeats evenly spaced), then add them back at the bust. Bamboo is forgiving, so small changes go a long way.
Troubleshooting bamboo
My tank grew overnight
Very normal for bamboo, especially if you skipped the wash-and-dry swatch step. Wash and lay flat to dry, then re-measure. If it is still too long, remove the hem, unravel a few rounds, and rework the hem tighter with a smaller hook.
My edges look wavy
Usually this means the ch-1 spaces are too loose, or your turning chain is adding height. Try a smaller hook for the edging, and consider using a standing dc instead of ch 3 turns.
My stitches keep sliding and I lose count
Switch hooks (wood helps), and place markers every 20 to 30 dc posts until the rhythm settles. Bamboo looks smoother when you slow down a little. It rewards patience.
Care
Bamboo yarn varies by brand, so always check your ball band. In general:
- Wash cool or lukewarm on gentle.
- Do not tumble dry hot.
- Lay flat to dry to help prevent stretching.
- Store folded, not on a hanger.
More easy-wear projects
If your hook is in a “lightweight and useful” mood, you might also enjoy exploring our broader pattern library in Guide to Crochet Patterns. And if you want a quick, satisfying project for warm weather crafting sessions, I love making practical, reusable items like these: Crochet Reusable Holiday Gift Bags.