
Crocheting Plush Valentine Hearts with Velvet and Chenille

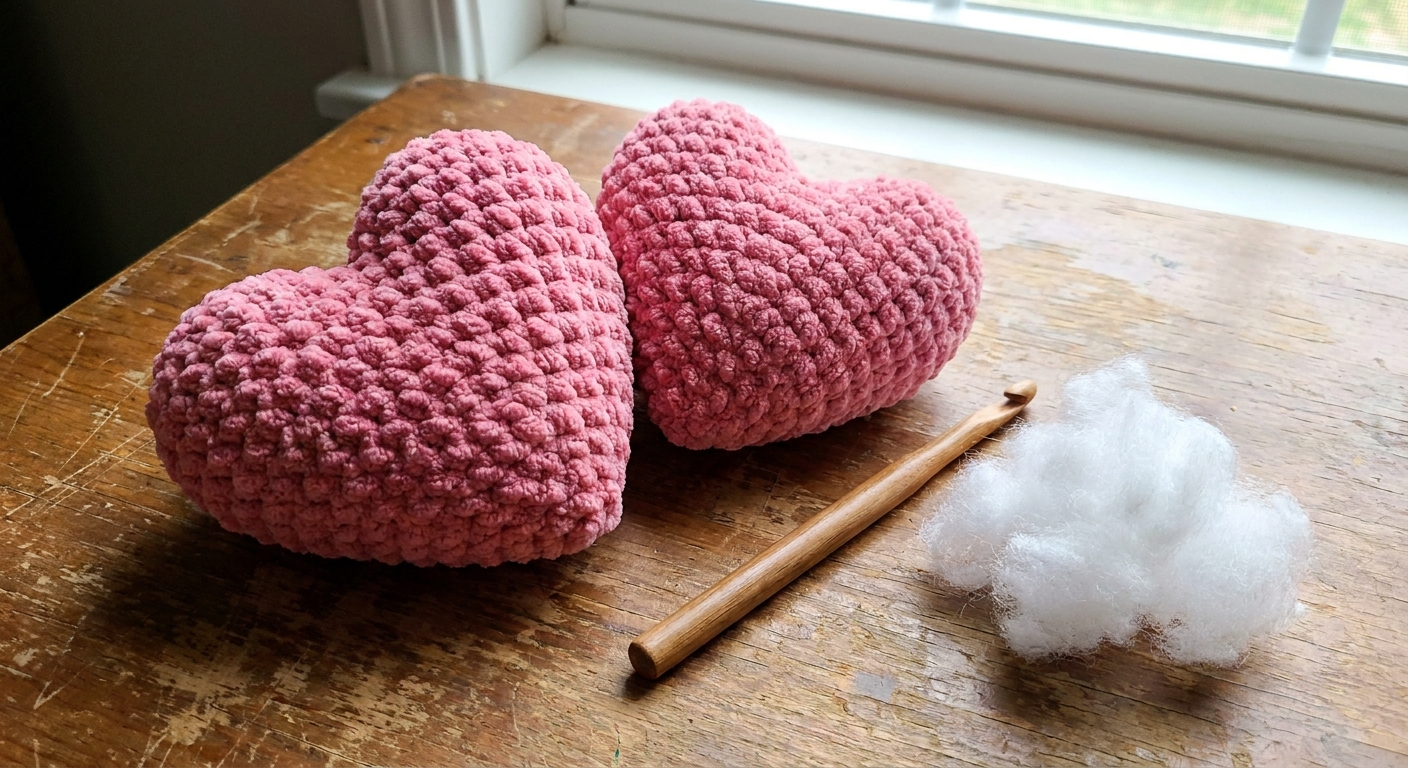
There is nothing quite like a plush little heart you can squeeze. Velvet and chenille yarns make the softest Valentine’s Day amigurumi, but they also love to test our patience. The first time I tried chenille, I could not see my stitches, my tension went wobbly, and the yarn shed like a tiny, fuzzy snowstorm.
The good news is that once you know a few tricks, these yarns become a joy. In this guide I’ll walk you through tension, stitch visibility, shedding, and finishing, then I’ll give you a reliable heart recipe you can use again and again.
Why velvet and chenille feel tricky
Many chenille style plush yarns are built around a core thread with short fibers (the fuzzy pile) wrapped around it. “Velvet yarn” is a broader category and can vary by brand, but the handling issues tend to be similar. That plush construction creates the dreamy look, but it also causes three common problems:
- Stitches are hard to see, especially in dark colors or low lighting.
- Tension changes easily because the yarn compresses under your fingers.
- Shedding and snapping can happen if the core gets stressed, especially at tight bends or after repeated frogging.
None of this means you are doing it wrong. It just means the yarn needs a slightly different approach than smooth cotton or acrylic.
Pick the right chenille for hearts
What to look for
- Firm core, dense pile: I find a sturdier core thread holds up better to tight stitches and sewing.
- Even thickness: Avoid yarn that visibly narrows and bulks as it runs through your fingers.
- Washable: If these hearts are going to kids, pets, or pockets, easy-care matters.
Yarn weight and finished size
Hearts work in almost any plush yarn weight. The thicker the yarn, the faster the project and the bigger the heart. If you are new to chenille, I personally like starting with a bulky to super bulky plush because the stitches are larger and easier to count by feel.
As a very rough reference, with super bulky plush yarn and a hook that gives you a dense fabric (often around 5 to 6.5 mm, depending on the yarn), expect a palm-sized heart, usually somewhere around 3 to 5 inches tall. Your exact size will vary with yarn, hook, and how firmly you stuff.
If you want help translating pattern language and stitch counts, my general pattern-reading refresher lives in our crochet patterns guide.
Hook size and tension
With amigurumi, we usually want tight stitches so stuffing does not show. With chenille, “tight” needs to be balanced with “gentle,” because yanking on the yarn can strip the fuzz or stress the core.
My go-to hook starting point
I usually start with a hook that is one to two sizes smaller than the yarn label suggests for regular crochet, then test a small swatch in single crochet:
- If you see stuffing through the holes, go down a hook size.
- If your hands hurt or the fabric feels stiff like a scrub pad, go up a hook size.
- If the yarn squeaks, shreds, or the core looks stressed, loosen up and size up.
Two tension tricks that help immediately
- Hold the yarn higher up: Instead of pinching right at the hook where the fuzz gets mashed, hold the yarn an inch or two back for smoother feed.
- Use the “lift, don’t yank” mindset: After completing a stitch, lift the loop to the height of your hook, then move on. Avoid pulling hard to “tighten” like you might with cotton.
Seeing stitches in plush yarn
This is the part that makes people swear off chenille, and it is also the easiest to fix with a few habits.
Use light and touch
- Bright overhead light makes a huge difference. I often add a small desk lamp aimed at my hands.
- Count by feel: In single crochet, each stitch has a little “post” you can pinch, and the top edge feels like a chain ridge. Your fingers can find it even when your eyes cannot.
Stitch markers matter
Place a marker in the first stitch of every round and move it up each round. If your heart uses increases and decreases, add a second marker halfway around so you can confirm your stitch count without recounting the whole round.
For extra-fuzzy yarn, a “running marker” helps a lot. Thread a smooth, contrasting strand (like cotton) through the first stitch of each round and let it trail upward as you go. It gives you a clear round line without fighting the pile.
If you like planning before you begin, I also recommend making a quick project card so you track hook size, yarn, and notes. I explain my method here: Make a project card before starting crochet.
Shedding, breakage, and frogging
Minimize shedding as you work
- Skip aggressive frogging: Chenille hates being unraveled repeatedly. If you must frog, do it slowly and let the yarn relax between your fingers.
- Avoid sharp pulls: If you tighten stitches by pulling the working yarn hard, the fuzz can strip near the core.
- Choose simple stitches: Single crochet is your best friend for plush amigurumi.
When the yarn end looks bald
If a yarn end sheds and reveals the core thread, you can still secure it. Leave a longer tail than usual, and weave it through multiple directions.
For extra security on gifts that will be handled a lot, I sometimes tie a small, neat knot in the core thread only (not the fuzz), then bury the tail inside the stuffing. Use this sparingly, and test on a scrap first. A knot can create a firmer spot in very small pieces, and it is not my favorite choice unless the yarn is really misbehaving.
Best stitches for plush hearts
For a classic puffy heart shape, you want a dense fabric that rounds easily.
- Single crochet (sc): Dense, simple, and forgiving.
- Invisible decrease: Reduces gaps so stuffing stays hidden.
- Increase (2 sc in one stitch): Creates smooth curves.
If invisible decreases feel fiddly in fuzzy yarn, you can do a standard sc2tog and simply tighten it gently, but try invisible first. It is worth it for plush makes.
Plush heart pattern
This is my favorite way to make a soft heart that looks good even when the stitches are a little hidden by the pile. You can make it palm-sized with bulky chenille, or bigger by using thicker yarn.
Materials
- Velvet or chenille yarn (any plush weight)
- Hook 1 to 2 sizes smaller than the yarn label recommends (as a starting point)
- Stitch marker
- Fiberfill stuffing
- Tapestry needle
- Optional: a little ribbon for hanging or gifting
Abbreviations
- MR: magic ring
- sc: single crochet
- inc: increase (2 sc in same stitch)
- dec: invisible decrease (insert hook in front loop only of next 2 stitches, yarn over, pull through 2 loops, yarn over, pull through 2 loops)
- sl st: slip stitch
Notes
- Work in continuous rounds unless noted.
- Use a stitch marker in the first stitch of each round.
- Stuff firmly but not rock-hard. Overstuffing can stretch holes open, especially with plush yarn.
Make two top bumps
Bump A
- R1: MR, 6 sc (6)
- R2: inc around (12)
- R3: (sc, inc) around (18)
- R4: sc around (18)
- R5: sc around (18), fasten off and leave a tail long enough to weave in securely
Bump B (do not fasten off at the end)
- Repeat R1 to R4 of Bump A.
- After R4, continue to joining step below.
Join and shape
- With Bump B still on the hook, sc in the next stitch or two until your working yarn is sitting on the outer side of the bump. I aim for the side that will become the left or right curve of the heart, not the center where the dip will be.
- Place Bump A next to Bump B, both right-side out (the same side you like best facing outward). Insert your hook under the top loops of a stitch on Bump A and sc to join.
- Continue working under the top loops around Bump A for 18 sc total. (18)
- Without chaining, continue around Bump B for 18 sc total. You now have one big round of 36 stitches. (36)
Body rounds
- Next round: (4 sc, dec) around (30)
- Next round: (3 sc, dec) around (24)
- Next round: (2 sc, dec) around (18)
- Next round: (sc, dec) around (12)
Stuff and close
- Add stuffing, shaping the point with your fingers. Add a little more stuffing than you think at first, then squeeze and adjust until it feels evenly puffy.
- Final round: dec around (6)
- Fasten off, close the remaining hole by weaving the tail through the front loops of the last 6 stitches, pull snug, and weave in the end.
- Final shaping: gently massage the stuffing into the point and smooth the top curves with your fingers.
Optional: define the heart dip
If you want a deeper indentation between the two top bumps, thread a needle with a long matching yarn tail, insert from the bottom center, come out at the dip between bumps, go back down near the starting point, and pull gently to create a soft pinch. Tie off and bury the tail inside. With chenille, pull slowly so you do not stress the core.
Finishing details
Weave in ends
Instead of weaving back and forth close to the surface, travel your yarn tail through the interior of the heart in longer passes. This hides the tail and reduces fuzz disturbance on the outside.
Add a hanging loop
To turn your heart into an ornament or bag charm, pull a ribbon or a doubled strand of smooth yarn through the top edge and knot it inside. I avoid chenille loops for hangers because the fuzz can wear down faster from rubbing.
Quick safety note
If the heart is for a small child or a pet, skip ribbons, beads, and anything that could come loose. A simple stitched loop made from smooth yarn is usually a safer choice than a tied-on accessory.
Care tips
Most plush yarn hearts do best with gentle handling. If the yarn label allows machine washing, I still recommend placing the heart in a mesh laundry bag and air-drying to protect the texture.
Troubleshooting
My heart is lumpy
- Add stuffing in small pieces and distribute it to the edges with your fingertips.
- Squeeze and roll the heart gently between your palms to even out the fill.
I cannot count stitches
- Use a lighter yarn color for your first plush heart.
- Add a stitch marker every 6 stitches for one round so you can verify counts in chunks.
- Try a running marker strand to track rounds without staring at the stitch tops.
Stuffing is showing
- Go down a hook size or tighten slightly by focusing on consistent loops, not pulling hard.
- Use matching stuffing color if you have it, or line the inside with a small scrap of matching yarn before stuffing.
The yarn snapped while sewing
- Thread your needle with the core carefully and avoid pulling at sharp angles.
- Use longer stitches when sewing. Tiny tight stitches can act like a saw on the core.
More holiday ideas
If you are in a festive groove, you might enjoy browsing our Holiday Crafts guide. And if you love working with novelty yarns for seasonal makes, my glow-yarn experiments are right here: Crocheting with glow-in-the-dark yarn for Halloween amigurumi.