
Tapestry Crochet Mug Rug Pattern

I still remember my first try at tapestry crochet. I was so excited about neat little color blocks… and then I flipped my work and saw a fuzzy mess of loops and lumpy tension on the back. If that sounds familiar, you are in exactly the right place.
This beginner tapestry crochet mug rug pattern is designed to help you practice the two skills that make colorwork feel calm instead of chaotic: carrying yarn neatly and changing colors cleanly. We will keep the shape small, the stitch count simple, and the pacing slow enough that you can actually enjoy the rhythm.
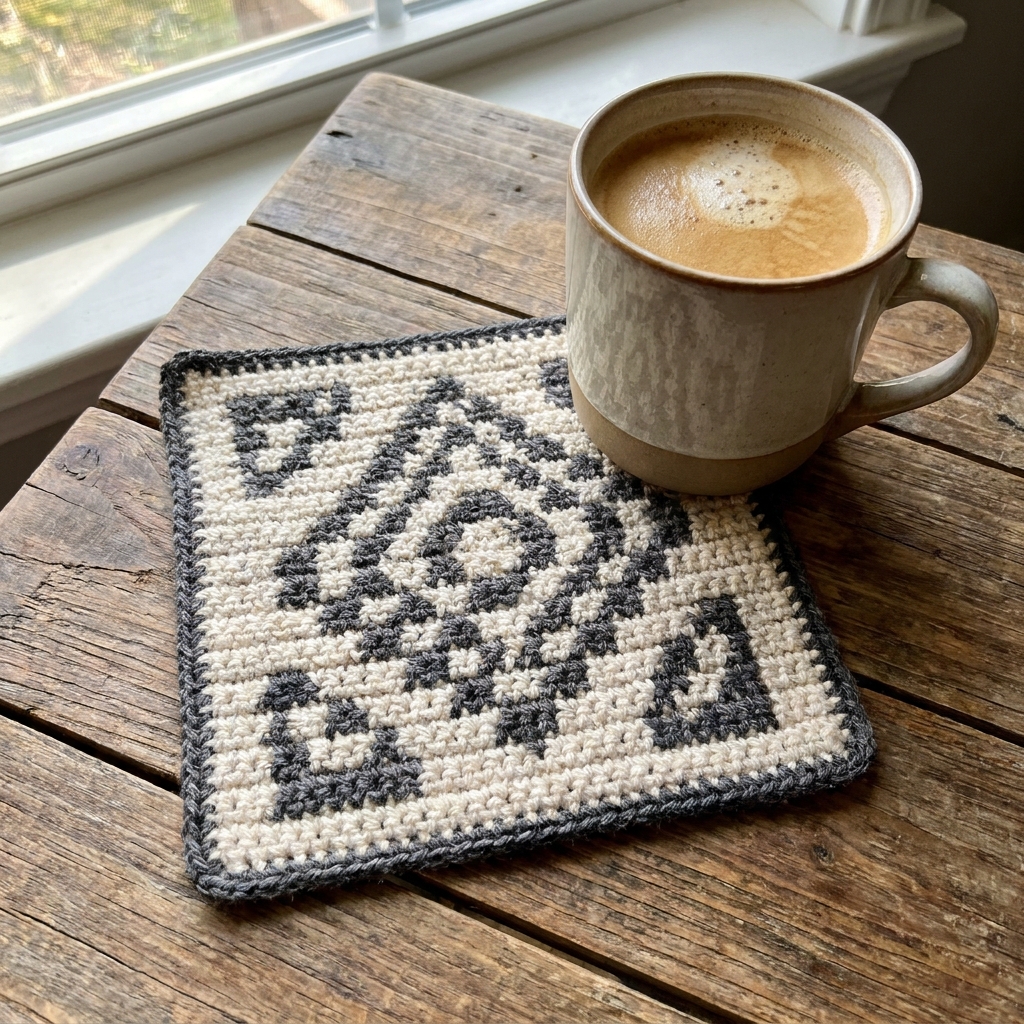
What tapestry crochet is
Tapestry crochet is colorwork where you crochet over the unused color so it gets carried inside the fabric. It is most commonly worked in single crochet, which is what we are using here.
From the front, you see crisp blocks of color. Inside, the carried yarn is hidden like a little cord running through your stitches.
The goal is not perfection. The goal is consistency. When your stitch tension stays steady and your color changes happen at the right moment, tapestry crochet suddenly feels very predictable.
Skill level and size
- Skill level: Beginner friendly if you are comfortable with single crochet (sc) and counting stitches
- Finished size: About 4.5 to 5 inches square, depending on your yarn and tension
- Construction: Worked in rows, then a simple single crochet border to tidy everything up
Supplies
- Yarn: Worsted weight (Category 4) cotton is my favorite for mug rugs because it stays flatter and is more heat-resistant than acrylic. You only need small amounts of two colors. As always, use care with very hot mugs and avoid fibers that can soften or melt.
- Hook: 4.0 mm to 5.0 mm. If you crochet loosely, go down a size for crisper colorwork.
- Notions: Scissors, yarn needle, stitch marker (optional but helpful)
Gauge note: Exact gauge is not critical for a mug rug. What you want is a dense single crochet fabric so the carried yarn stays hidden. If you can see the carried color peeking through, try a smaller hook.
If you are still building confidence with pattern reading, I have a friendly overview in Guide to Crochet Patterns.
Before you start
Rule 1: Carry the unused color
Even if you are only switching for one stitch, carry the unused color inside the row. That is what keeps the back tidier and stops long floats from snagging.
Rule 2: Change colors early
In single crochet, the color you pull through on the last yarn over becomes the color of the next stitch. So you will switch colors when you have two loops on your hook and you are about to finish the stitch.
Abbreviations and notes
- ch = chain
- sc = single crochet
- st(s) = stitch(es)
- RS/WS = right side/wrong side
Notes: This pattern uses two colors: Color A (background) and Color B (motif). You will carry whichever color is not in use inside the stitches. When you see “carry,” that means keep the unused strand lying along the top of the previous row and crochet right over it.
About RS and WS: Because this is worked in rows, you will have a right side and a wrong side. It is normal for the wrong side to look a bit busier, especially at color changes. The border helps stabilize the edges and makes the whole piece feel more polished.
Carry yarn neatly
Set both yarn balls on the same side as you, with Color A on the left and Color B on the right (or vice versa). Every time you change colors, drop the old color to the back of your work and pick up the new one from underneath the old strand. This simple habit helps prevent twisting.
If you are left-handed or you naturally hold yarn differently, the exact direction does not matter. What matters is choosing one pickup direction and sticking with it so your strands stay calm.
Tension tip: Do not pull the carried yarn tight. After every color change, gently stretch the work sideways for a second. That tiny reset keeps the fabric from puckering.
Clean color changes
Here is the moment that matters:
- Insert hook into next stitch.
- Yarn over with current color, pull up a loop (two loops on hook).
- Switch colors now by dropping the old yarn and yarn over with the new color.
- Pull through both loops to finish the sc.
If your color steps look jagged, it is almost always because the new color was introduced one stitch late. That is good news because it is an easy fix.
Mug rug pattern
This design is a simple centered block. You will crochet a background with a solid square of contrast color in the middle, then add a border for a finished look.
Setup
- Color A = background
- Color B = center block
Row 1 (RS)
With Color A, ch 21. Sc in 2nd ch from hook and in each ch across. (20 sts)
Row 2
Ch 1, turn. Sc in each st across with Color A. (20)
Row 3
Ch 1, turn. Sc 6 with Color A. Begin using Color B: sc 8 with Color B, then sc 6 with Color A. Carry the unused yarn inside the row as you go. (20)
Rows 4 to 10
Repeat Row 3 exactly. You will have a 8-stitch-wide, 8-row-tall block of Color B centered in your mug rug.
Row 11
Ch 1, turn. Sc in each st across with Color A. (20)
Row 12
Ch 1, turn. Sc in each st across with Color A. (20)
What to do with Color B on plain rows: On Rows 1 to 2 and Rows 11 to 12, I recommend simply dropping Color B and letting it hang at the edge where you last used it, then picking it back up when the center block starts again. Since Color B is only used in the middle section, you do not need to carry it across rows where it is not used.
Fasten off, leaving tails for weaving.
Optional squaring tip: If your sides lean a bit (very normal while learning), lightly steam block or wet block the square and let it dry flat before adding the border.
Border
Join Color A in any corner. Work a round of sc evenly around the mug rug.
- Work 1 sc per stitch across the top and bottom edges.
- On the sides, work 11 to 12 sc evenly per side. Most crocheters use about 1 sc per row end, but row ends can vary by tension. The goal is flat sides with no rippling and no pulling.
- In each corner, work (sc, ch 1, sc) to turn cleanly.
- Sl st to the first sc to join, fasten off.
Weaving in ends: On the back, weave tails through stitches of the same color whenever possible. I like to run the needle through the legs of several single crochets, then change direction and do it again. If you tend to split plies, slow down and aim for the spaces between stitches so the tail does not pop to the front.
If a carried strand peeks through near a color change, that is usually a sign the fabric needs slightly tighter sc tension next time or a smaller hook.
Make it more practical
Best yarn choice
For coasters and mug rugs, I reach for cotton because it is absorbent and tends to hold shape well. Acrylic can work, but it may feel springier and can show carried yarn a bit more.
Make it thicker
If you want extra cushion, crochet the same square twice and single crochet the two layers together around the edges (treat them like one piece as you work the border). This also hides all ends between layers.
Troubleshooting
My work puckers at color changes
- Loosen the carried yarn slightly. It should lie flat inside the fabric, not cinch it.
- After switching colors, gently spread the stitches across the row.
- Consider using a hook 0.5 mm larger if you naturally crochet tight.
The unused color shows through
- Try a smaller hook for denser stitches.
- Carry the yarn consistently in the same position inside the stitch. If it flips, it can peek through.
- High-contrast colors make show-through more obvious. If it drives you nuts, try two colors closer in value for your first few practice squares.
My edges look wavy
- Count stitches every row, especially near the color block.
- Make sure you do not tighten your turning chain. For this pattern, the ch 1 does not count as a stitch.
- On the border, adjust the number of side stitches (11 or 12) until the edge sits flat.
Next steps
Once this feels comfortable, you can turn the same idea into tiny pixel patterns, initials, or simple motifs. If you love small, low-pressure projects, you might also enjoy browsing Guide to Yarn Crafts for more easy makes that use up those little leftover balls.
And if you want a different kind of relaxing repeat, the classic stash-friendly favorite is always waiting: Classic Granny Square Blanket Pattern (Step by Step).