
Chunky Ribbed Crochet Beanie Pattern

The first time I crocheted a “simple” ribbed beanie in chunky yarn, I ended up with something that could have doubled as a helmet. The stitch pattern was fine. The yarn was gorgeous. The problem was my hook choice. With heavy winter yarns, one hook size up or down can completely change whether your ribbing hugs your head or stands up on its own.
This pattern is my go-to chunky ribbed beanie, plus the exact method I use to match hook size to wool versus acrylic so you get that comfy, stretchy ribbed drape.
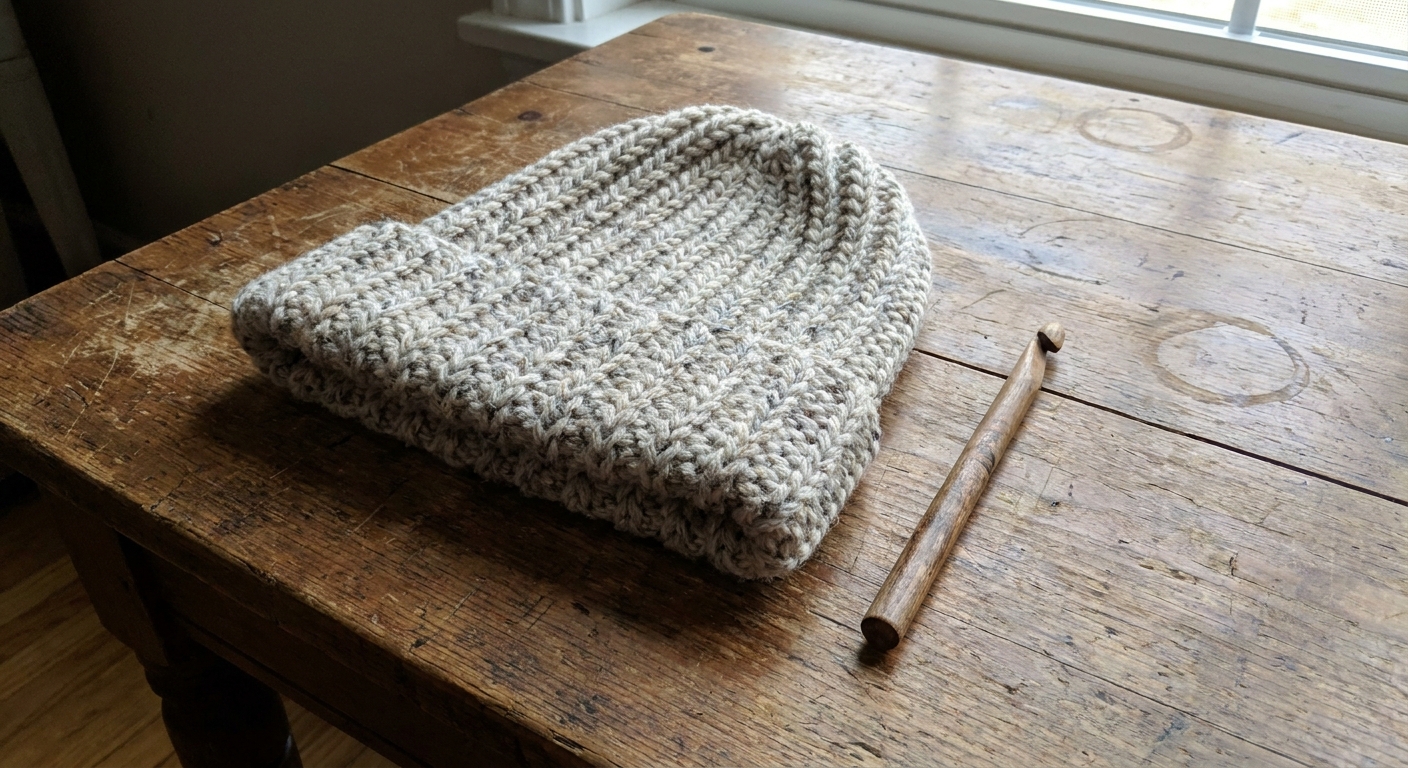
What you will make
A classic ribbed beanie worked as a flat rectangle, then seamed and cinched at the crown. This construction is beginner-friendly, easy to adjust, and perfect for testing how different fibers behave.
- Skill level: Confident beginner
- Construction: Rows of ribbing worked in the back loop only, then seam + gather
- Why it works: The ribbing provides stretch. Hook size controls drape and density.
Materials
- Yarn: Super bulky (#6) or chunky (#5) yarn, about 90 to 140 g depending on size, yardage per 100 g, and whether you add a deep cuff or slouch
- Hook: See hook matching guidance below (I usually start with 8.0 mm or 9.0 mm for super bulky, and 6.5 mm or 7.0 mm for chunky)
- Tapestry needle
- Stitch marker (optional)
- Measuring tape
- Scissors
If you want more yarn selection help for winter makes, my thoughts on fiber performance are also in Best Yarn for Heirloom Crochet Stockings: Wool vs Acrylic. Stockings are different from hats, but the fiber behavior lessons carry over beautifully.
Stitches and notes
- ch = chain
- sc = single crochet
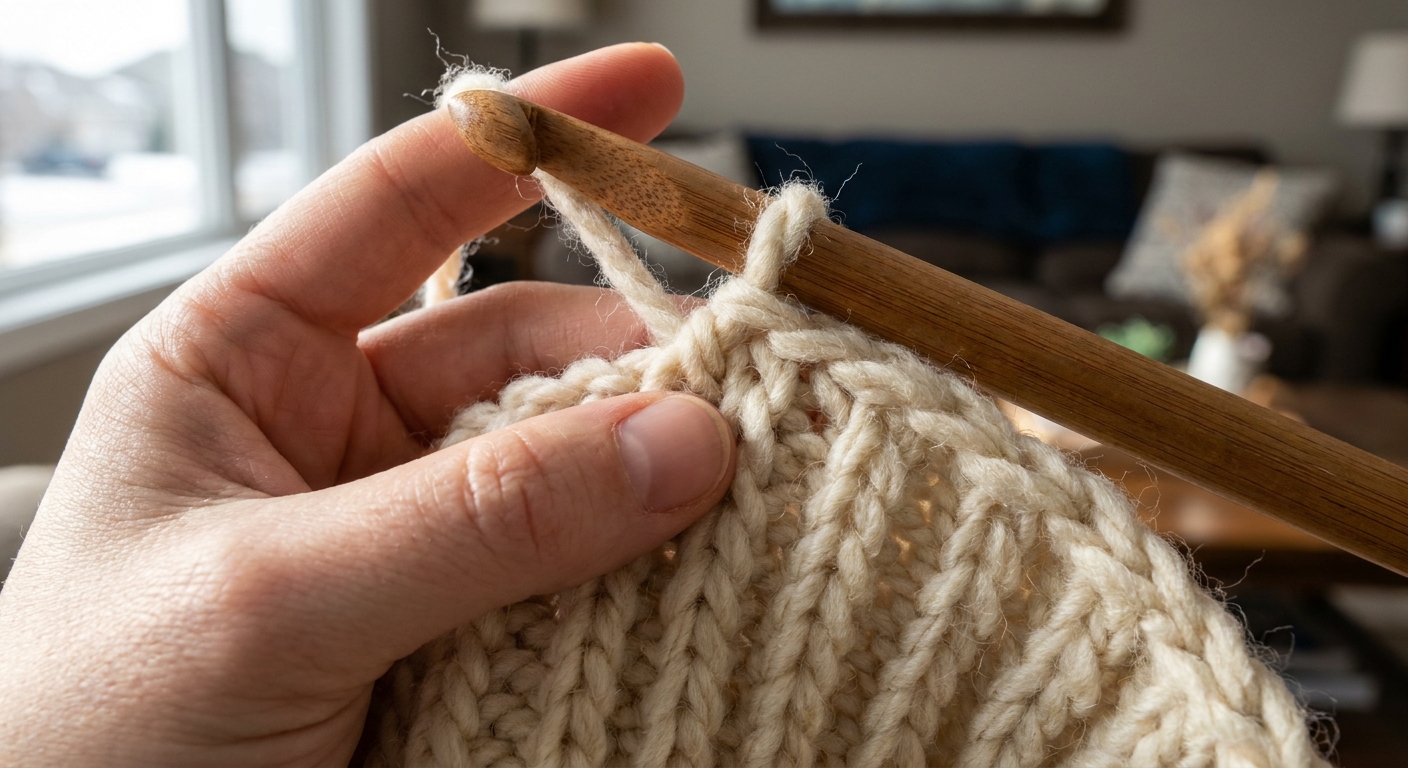
- blo = back loop only (work into the back loop of the stitch)
- sl st = slip stitch
Turning chain: ch 1 does not count as a stitch.
Ribbing tip: The beanie stretch comes from the direction of the rows. Your rows run vertically when worn, so the hat stretches around the head.
Hook matching method
Ignore the yarn label for a moment and do a quick ribbing swatch. Ribbing behaves differently than plain single crochet, and it will tell you the truth fast.
Step 1: Make a mini swatch
Ch 11. Row 1: sc in 2nd ch from hook and in each ch across (10 sc). Ch 1, turn. Row 2: sc blo in each st across (10). Ch 1, turn. Repeat Row 2 until you have about 12 to 14 rows.
Step 2: Stretch test
Hold the swatch at the short ends and stretch it gently. You are looking for ribbing that:
- stretches without feeling “crunchy”
- springs back instead of staying stretched out
- lies flatter instead of cupping
Step 3: Decide by fiber and yarn build
Fiber guidance is a tendency, not a law. Ply, twist, and finishing (including superwash) can change the result, so use your swatch as the final vote.
When the yarn is wool (or a wool blend)
- Wool often grips and can bloom. Many wools look a bit fuller after wear or blocking, and ribbing can become nicely plush.
- My usual move: Start at the recommended hook for the yarn, then consider going down 0.5 to 1.0 mm if the ribs look too relaxed.
- What you are aiming for: Defined ribs and a fabric that feels warm, not holey. Wool usually does not need big gaps to drape.
When the yarn is acrylic
- Acrylic is springy and can feel bouncy. In ribbing, it can sometimes stand up more and take longer to relax.
- My usual move: Try going up 0.5 to 1.0 mm from the label recommendation to soften the fabric and improve drape.
- What you are aiming for: Ribs that bend easily when you fold the fabric. If it feels board-like, size up.
Quick red flags
- Too small a hook: Ribbing is stiff, edges curl hard, stretch feels limited, seams look bulky.
- Too large a hook: Ribs look sloppy, hat feels airy, ribbing “grows” and does not bounce back.
My personal rule: For hats, I would rather re-swatch for five minutes than crochet a whole beanie that does not feel good on my head. This is one of those projects where a tiny test saves a lot of frogging.
Sizing and fit
This beanie is sized by head circumference. Ribbing stretches, so we make the hat slightly smaller than the head measurement.
Two measurements matter: your starting chain sets the hat height (brim to crown), and your row count sets the hat circumference (around the head).
Choose your size, then keep adding rows until the long edge of your rectangle (unstretched) matches the target “hat circumference” below.
| Size | Fits head circumference | Target hat circumference (unstretched) | Hat height (before seaming) |
|---|---|---|---|
| Child | 18 to 20 in (46 to 51 cm) | 16.5 to 18 in (42 to 46 cm) | 7 to 7.5 in (18 to 19 cm) |
| Teen / Small adult | 20 to 22 in (51 to 56 cm) | 18.5 to 20 in (47 to 51 cm) | 8 to 8.5 in (20 to 22 cm) |
| Adult | 22 to 24 in (56 to 61 cm) | 20 to 22 in (51 to 56 cm) | 8.5 to 9.5 in (22 to 24 cm) |
Hat height: This is the measurement from brim to crown, and it is set by your starting chain length. Add 0.5 in if you like a slouchier look.
Chunky ribbed beanie pattern
Customize first: Decide your hat height, then chain to match it. With chunky and super bulky yarns, a small chain change makes a big difference, so measure as you go.
Important: Row count varies a lot by yarn and tension. Trust your measuring tape more than a specific number of rows.
Foundation
Ch: ch 25 (child), ch 28 (teen/small adult), ch 31 (adult) or chain until your strip measures your chosen hat height in inches. (These counts are starting points, not rules.)
Row 1
Sc in 2nd ch from hook and in each ch across. (One sc per chain.) Ch 1, turn.
Row 2
Sc blo in each st across. Ch 1, turn.
Repeat
Repeat Row 2 until the long edge of the rectangle (unstretched) matches your target hat circumference from the sizing table.
Last row (optional)
If you want a slightly cleaner seam line, work one final row of sc in both loops across. Then fasten off, leaving a long tail for seaming.
Seam the beanie
Fold the rectangle so the first and last rows meet, ribs running vertically. Seam the short edges together using a whip stitch or slip stitch seam through both layers. Turn the tube right side out.
Cinch the crown
Thread a long tail (at least 18 in) onto your tapestry needle. Weave in and out around the top edge of the tube, catching the tops of the ribs like a running stitch. I like to grab at least one loop at the top of each row end so the gather is even and there are no surprise gaps. Pull tight to cinch. Take a few stitches across the gathered opening to secure, then weave in ends.
Optional brim
Fold up 1.5 to 2.5 in for a cuff. Ribbing is forgiving, so cuff height is purely preference.
Wool vs acrylic results
With wool
- Look: Plush ribs, stitch definition may soften over time
- Feel: Warm, elastic, breathable
- Hook note: If your beanie looks a bit too relaxed, try a smaller hook and keep the same stitch count.
With acrylic
- Look: Crisp stitch definition, can appear puffier in the ribs
- Feel: Smooth, springy, sometimes a touch squeaky on the hook
- Hook note: If it feels stiff, go up a hook size, or loosen your tension slightly in the back loop rows.
If you are brand new to choosing yarn for a specific result, the broader primer in Guide to Yarn Crafts is a good companion read when you are building confidence with fiber choices.
Troubleshooting
My ribbing is slanting
A little slant is normal in crochet ribbing, especially in chunky yarn. If it is dramatic, you may be accidentally adding or skipping a stitch. Count the first few rows and place a stitch marker in the first stitch of the row.
The seam looks bulky
Try a whip stitch seam through the outer loops only of each edge, and do not pull too tight. Also check hook size. A too-small hook makes thick, dense edges that stack into a ridge.
It fits, then grows
This can happen with very soft acrylics and some superwash wools, especially after washing or a lot of wear. Make the rectangle slightly shorter (0.5 to 1 in less circumference) and consider a slightly smaller hook to help the ribs bounce back.
It is itchy
Some wool is just honest about being wool. A folded brim helps by adding a double layer. Or choose acrylic for next time. Comfort always wins.
Easy upgrades
- Add a pom: Attach a pom at the cinched crown after you secure the gather.
- Make it extra warm: Crochet a simple liner band. Join yarn around the inside brim and work 1 to 2 rounds of sc.
- Try a textured rib: Swap sc blo for hdc blo for taller ribs. (You will need fewer starting chains for the same height.)
Finishing notes
Blocking: Light blocking can help the ribbing settle. For wool, a gentle wet block and air dry can smooth the fabric without killing the stretch. For acrylic, steam can change the drape quickly, so test on a swatch first and keep heat low and brief.
FAQ
Can I use bulky (#5) instead of super bulky (#6)?
Yes. You will usually need a smaller hook and more rows to reach the same circumference. Start with the swatch method above, then build your rectangle to the measurements in the sizing table.
How do I know if my hook is right without a full gauge swatch?
That mini ribbing swatch is the shortcut. If it stretches comfortably, springs back, and folds without fighting you, you are in the sweet spot.
Why does acrylic sometimes look less drapey in ribbing?
Acrylic has a buoyant, springy structure. In thick ribbing, it can hold its shape more. A slightly larger hook often adds the flexibility you want.
Where can I learn more about reading patterns?
I keep my beginner-friendly explainers in Guide to Crochet Patterns, especially if abbreviations and turning instructions still feel a little like a foreign language.
Final fitting tip
If you are torn between two hook sizes, crochet the first 10 to 12 rows with each hook using the same yarn. Then wrap each strip around your head like a headband and see which one relaxes into place. The “right” hook is the one that makes you exhale when you put it on.
That is the beanie I want you to end up with: cozy, stretchy, and happily un-fussy.